Cloud:IaaS:3CX
From VTX Public Wiki
Introduction[edit | edit source]
The goal of this page is to be able to setup a 3CX PBX system hosted in our VTX IaaS infrastructure.
Prerequisites[edit | edit source]
- Have subscribed to a "Connect_PABX-IP*" service at VTX.
- Have subscribed to a "Business Cloud-IaaS" service at VTX.
- Have downloaded the "configsheet" PDF file who contains the "Business Cloud-IaaS" credentials.
- If the option with "Edge Gateway" has been ordered, define a private network subnet (Wikipedia.org - Private IPv4 addresses).
- Choose a size of "VM Sizing Policy" according to your needs using the chart below:
| Size of the organization | Requirements | VM Sizing Policy |
|---|---|---|
| Small (up to 10 ext.) | 1vCPU - 1GB RAM - 30GB Storage | Small 3CX |
| Medium (up to 50 ext.) | 4vCPU - 4GB RAM - 100GB Storage | Medium 3CX |
| Large (up to 250 ext.) | 6vCPU - 8GB RAM - 300GB Storage | Large 3CX |
Retrieve the credentials of the "Business Cloud-IaaS" service[edit | edit source]
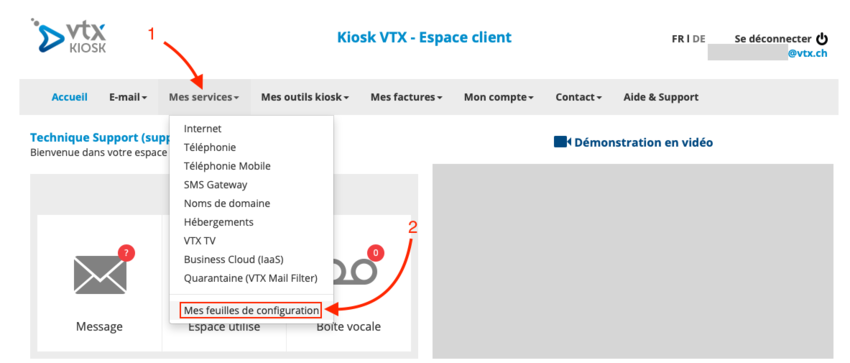
First you have to connect to the VTX Kiosk : https://kiosk.vtx.ch.
- Click on "Mes Services"/"Meine Dienste"
- Then click on "Mes feuilles de configuration"/"Meine Konfigurationsblätter"
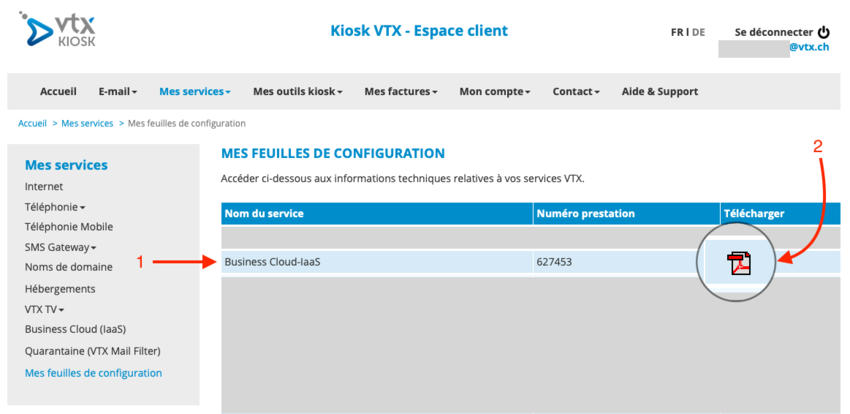
- Search for the right service "Business Cloud-IaaS".
- Click on the PDF icon in the right to download it.
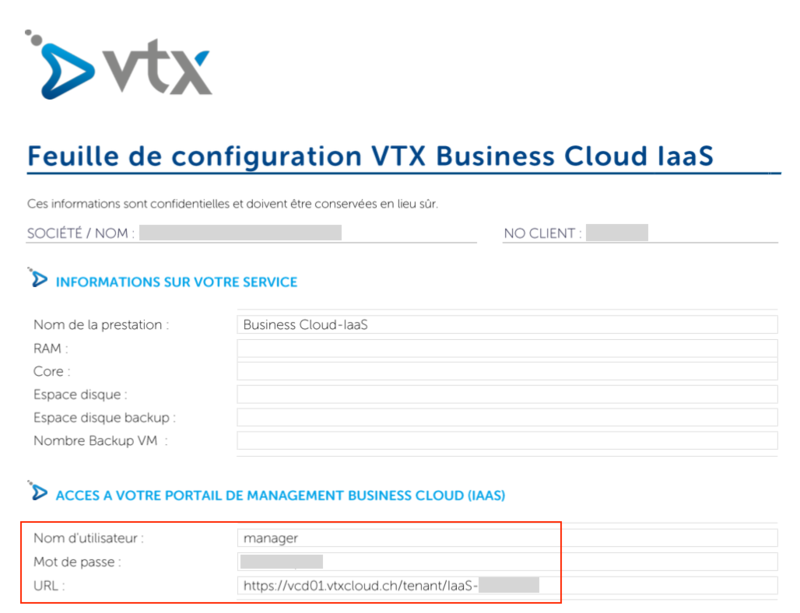
Then open this file. You can found the credentials there :
French version:
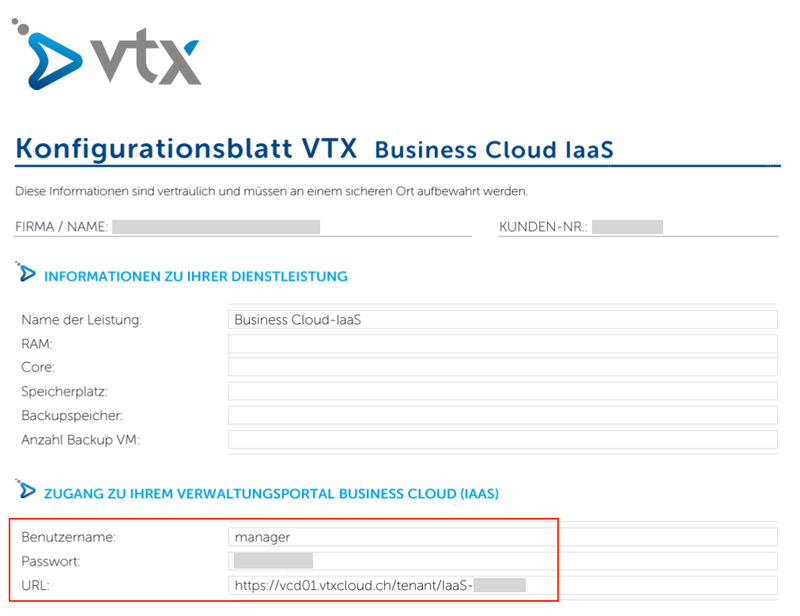
German version:
Preparing and creating the VM[edit | edit source]
Preparing the VM[edit | edit source]
With Edge firewall[edit | edit source]
Create a new internal network[edit | edit source]
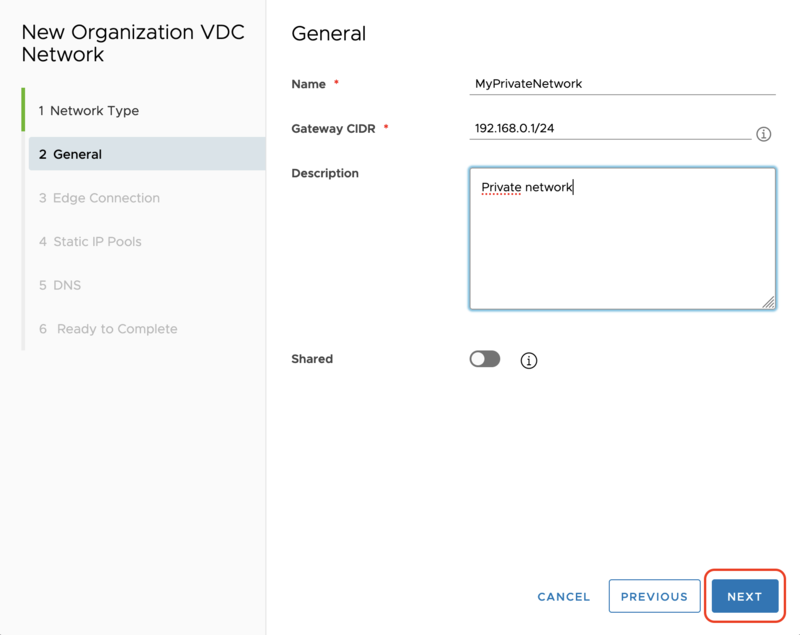
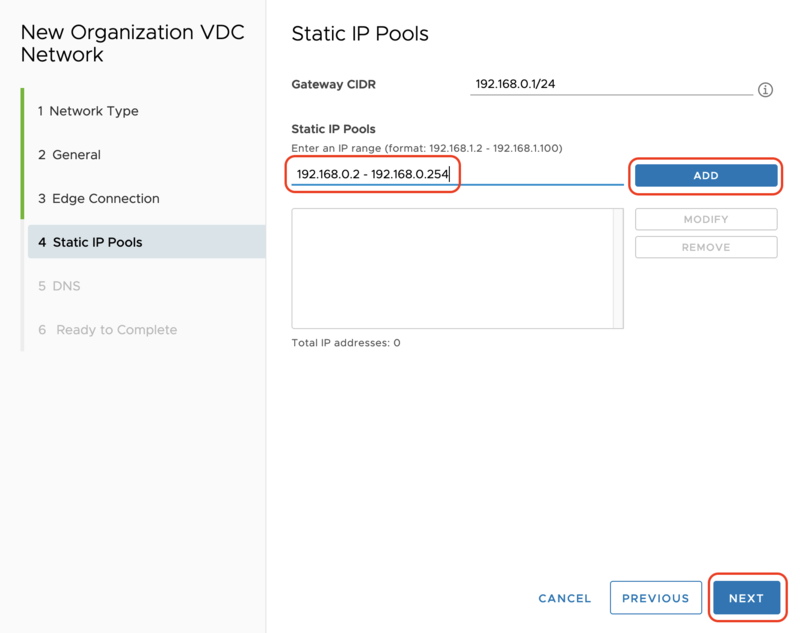
In these screenshots below, we will create a 192.168.0.0/24 private network:
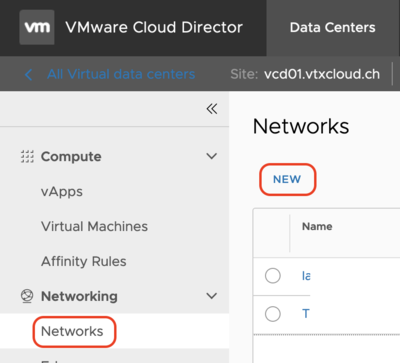
- In your vDC click on "Networks" under "Networking" in the left panel. Then click on "New".
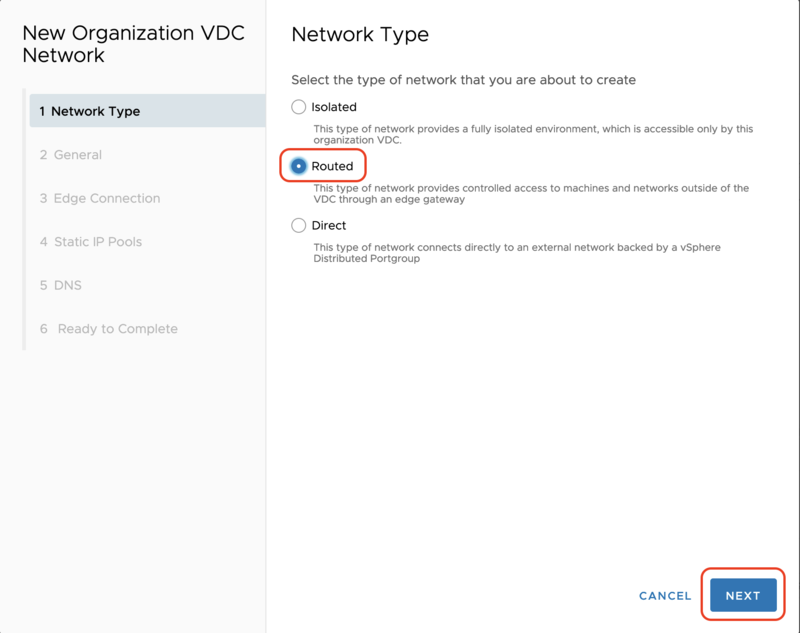
- Choose Network type : "Routed" and click "Next".
- Give a name to your Internal Network, enter the gateway in CIDR format then click on "Next".
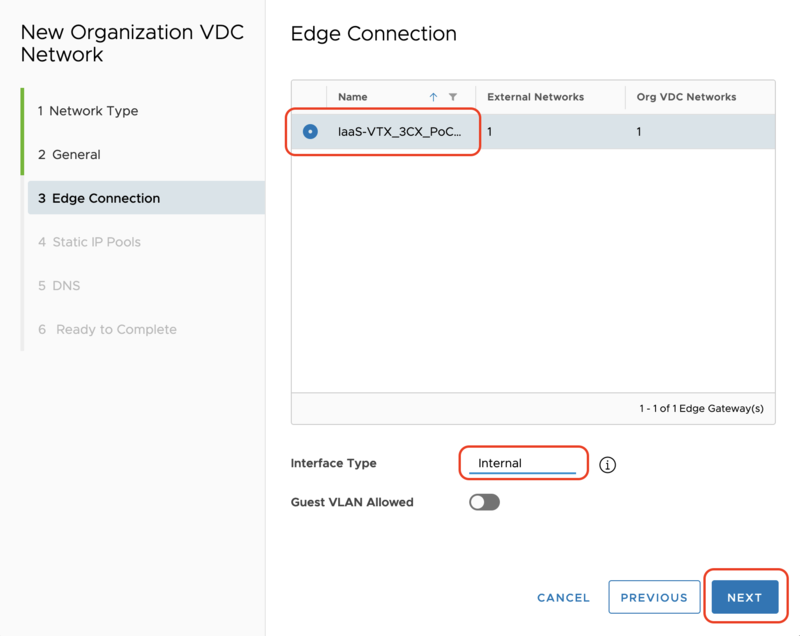
- Select the Edge Gateway then choose interface type: "Internal" and click on "Next".
- Add the gateway full CIDR IP and the IP pool (without the gateway). Then click "Next".
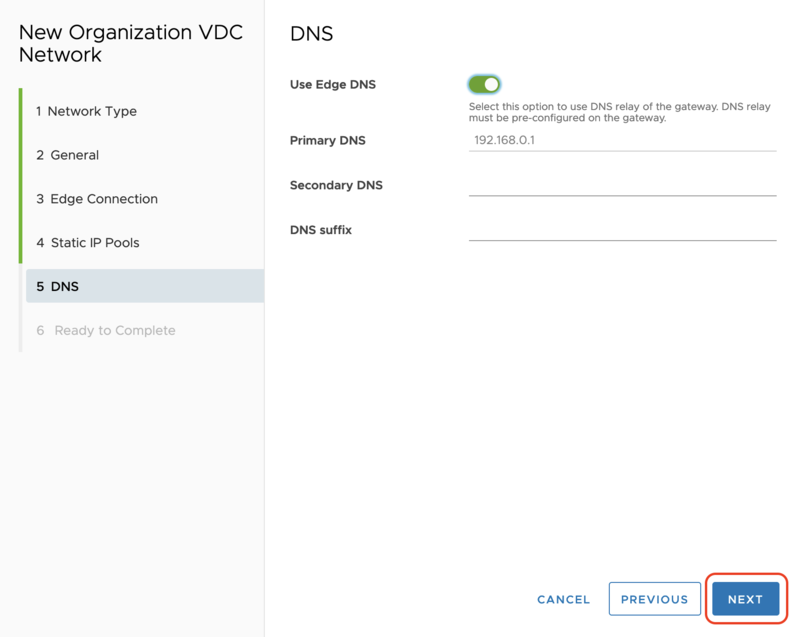
- Let by default "Use Edge DNS" -> This option will use VTX DNS servers. Then click on "Next".
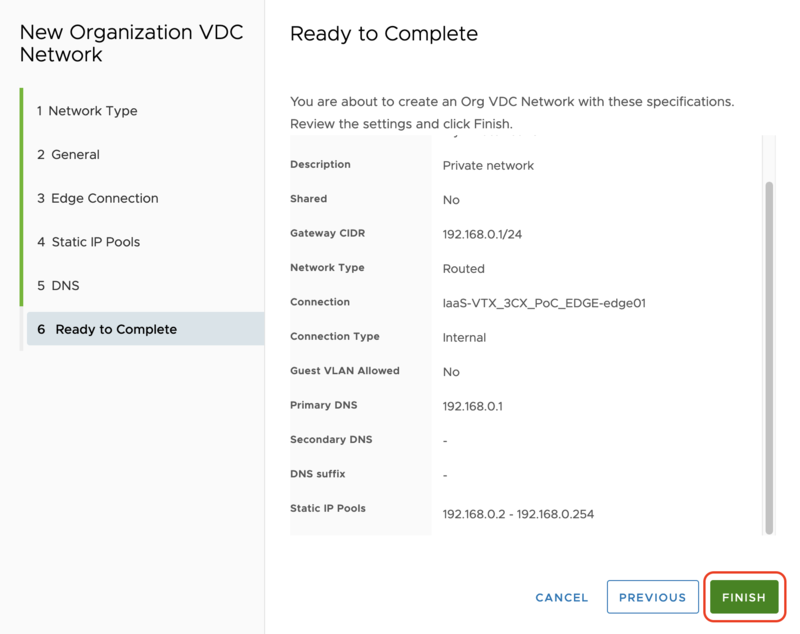
- Review if everything is OK then click "Finish".
Create the SNAT & DNAT rules on the Edge Gateway[edit | edit source]
Follow this guide to create the NAT rules below.
In this example, "10.10.0.10" is the local IP of the 3CX Debian VM and "212.40.XX.XX" is the public IP used.
SNAT - Applied on : Edge - Original IP : 10.10.0.10 - Port: Any - Translated IP: 212.40.XX.XX - Port: Any - Protocal : Any - Enable : YES
DNAT - Applied on : Edge - Original IP : 212.40.XX.XX - Port: Any - Translated IP: 10.10.0.10 - Port: Any - Protocal : Any - Enable : YES

Create the Firewall rules for all VoIP services[edit | edit source]
The rule "Allow everything outgoing" has to be setup after VM creation as it needs to be attached to the virtual NIC of the VM.
In this example, "212.40.XX.XX" is the public IP used for the 3CX. "vnic1" is the virtual interface of the 3CX vm.
| Name | Type | Source | Destination | Service | Action |
|---|---|---|---|---|---|
| VoIP - SIP Communications | User | Any | 212.40.XX.XX | tcp:5060:any tcp:5061:any udp:5060:any |
Accept |
| VoIP - 3CX Tunnel for Push | User | Any | 212.40.XX.XX | tcp:5090:any udp:5090:any |
Accept |
| VoIP - HTTPs for Presence and Provisioning | User | Any | 212.40.XX.XX | tcp:443:any tcp:5001:any |
Accept |
| VoIP - RTP Audio Communications | User | Any | 212.40.XX.XX | udp:9000-10999:any |
Accept |
| 3CX Web Interface | User | Any | 212.40.XX.XX | tcp:5015:any | Accept |
| Allow everything outgoing | User | vnic-1 | Any | Any | Accept |
You should have this:

Creating the VM[edit | edit source]
Connect to the URL of your vtxcloud.ch account (ex. : https://vcd01.vtxcloud.ch/tenant/XXXXXX/).
To create a VM, go to your vDC then click on the New VM link
- Name: Choose a name for your VM on vCloud Director
- Computer name: Chose the hostname for your VM. Example : 3cxServer
- Description: Choose a description of your VM
- Type : Choose New.
- OS family: Choose Linux.
- Operating System: Choose Debian GNU/Linux 10 (64-bit).
- Boot image: Choose the ISO debian10-amd64-netinst-3cx.iso.
- Sizing Policy : Use the chart from Cloud:IaaS:3CX#Prerequisites to choose the good VM Sizing Policy fitting your needs.
- Storage : Choose "IaaS SSD" under "Storage Policy" and use the chart from Cloud:IaaS:3CX#Prerequisites to know requirements in terms of storage size (30GB/100GB/300GB) matching your VM Sizing Policy.
- Network Configuration :
Without Edge firewall
You can directly setup the VM with a public IP. The VM will be secured with the build-in firewall named "NFtables".
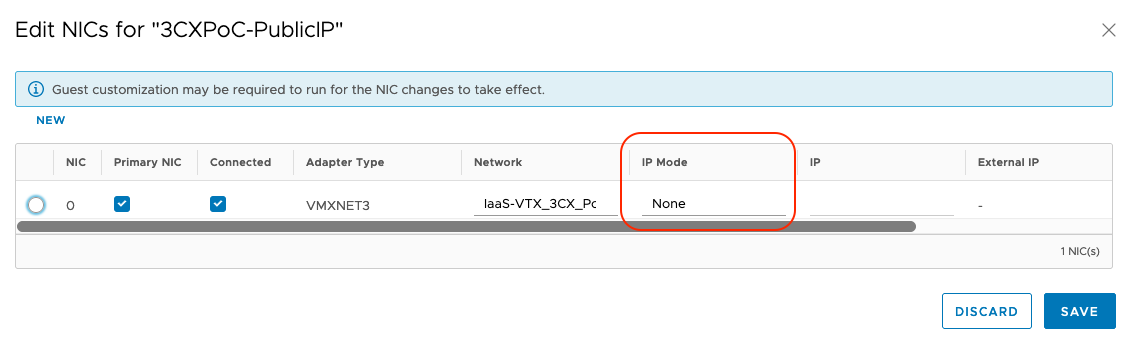
- Under "Networking" click on "Customize" then under "Network" be sure to have selected the "Edge..." network. (You can use this guide if needed.). "IP mode" choose "None".
- Confirm the creation of the VM by clicking "OK".
- After creation of the VM, you will need to setup the public IP directly on the VM during the next step "3CX Installation using custom 3CX Debian ISO".
With Edge firewall
- Under "Networking" click on "Customize" then under "Network" choose the newly created private network (You can use this guide if needed.). "IP mode" choose "None".
- Confirm the creation of the VM by clicking "OK".
- After creation of the VM, you need to create the last firewall rule on the Edge Gateway "Allow everything outgoing" using the firewall rules tables in the "preparing the VM" section.
- You will need to setup the private IP on the VM during the next step "3CX Installation using custom 3CX Debian ISO".
3CX Installation using custom 3CX Debian ISO[edit | edit source]
Boot your VM via the vCloud panel : "Actions" -> "Power On"
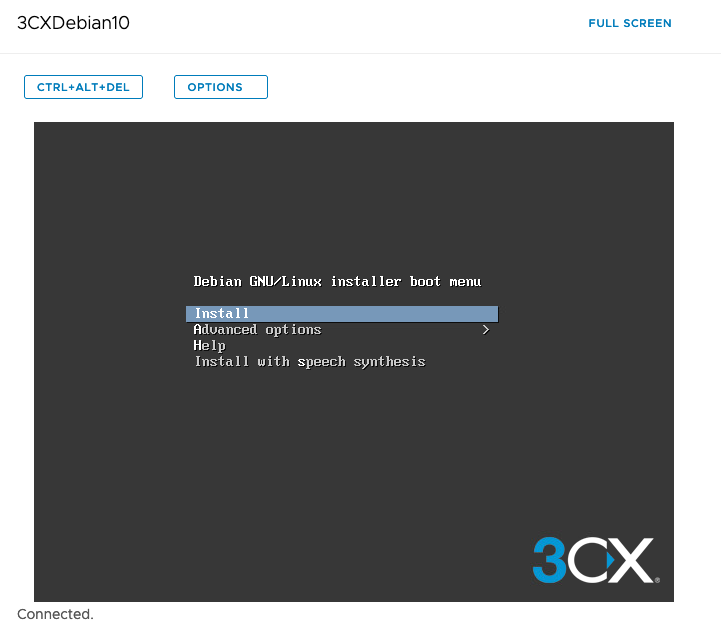
Press Enter when you are on « Install »
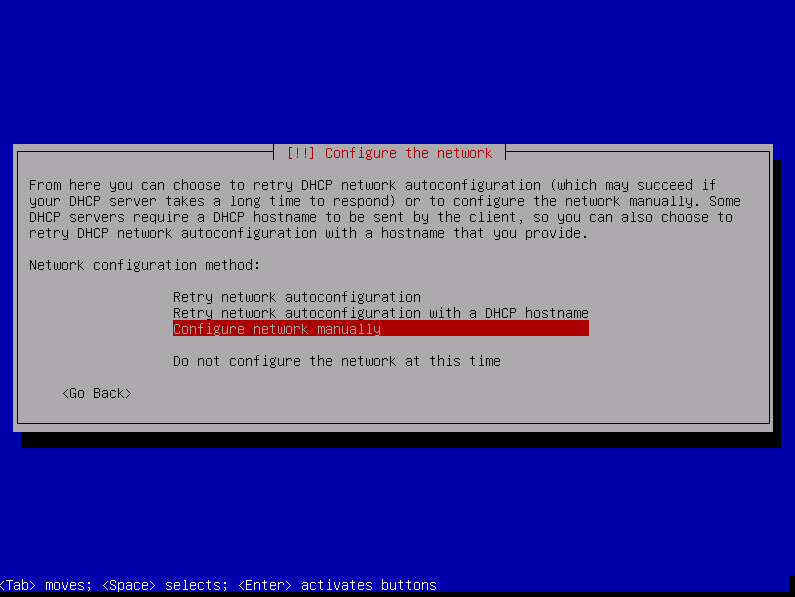
First you will start with the network configuration. In our case we will select « Configure network manually »
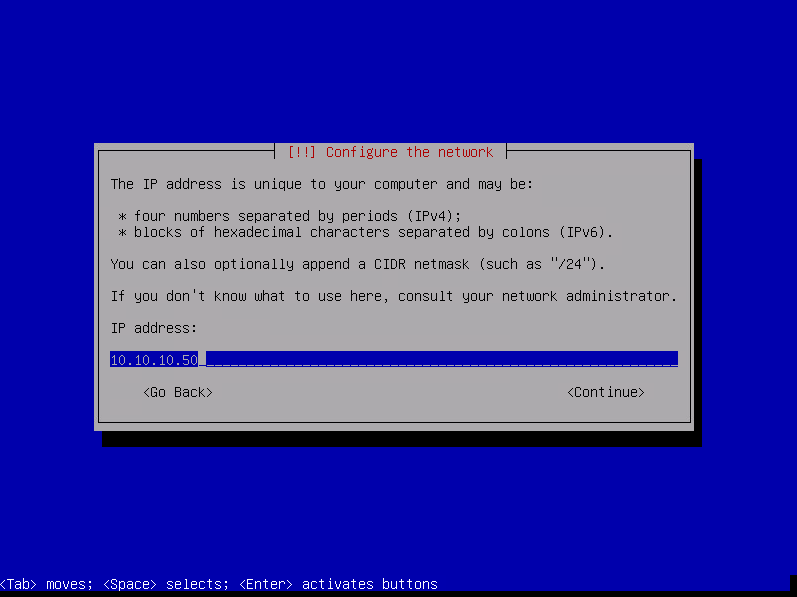
Enter the IP then select « Continue » and press enter.
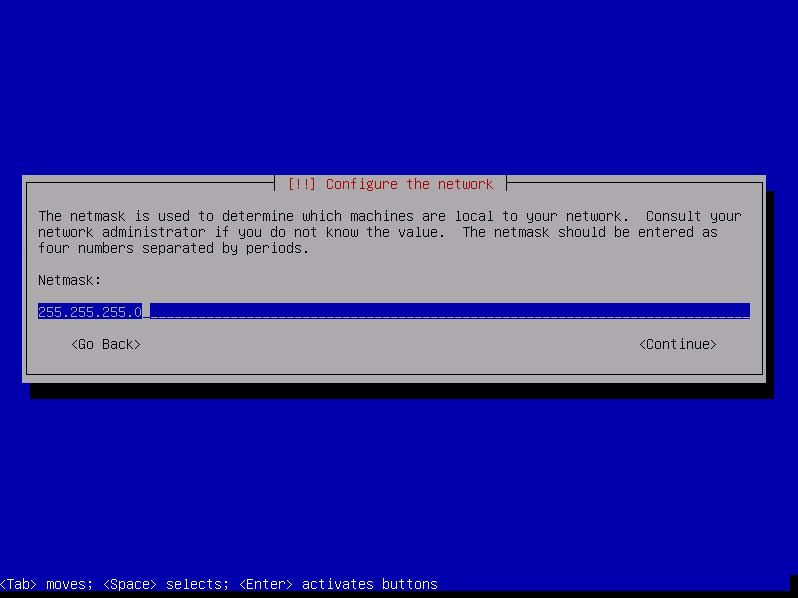
Fill netmask then select « Continue » and press enter.
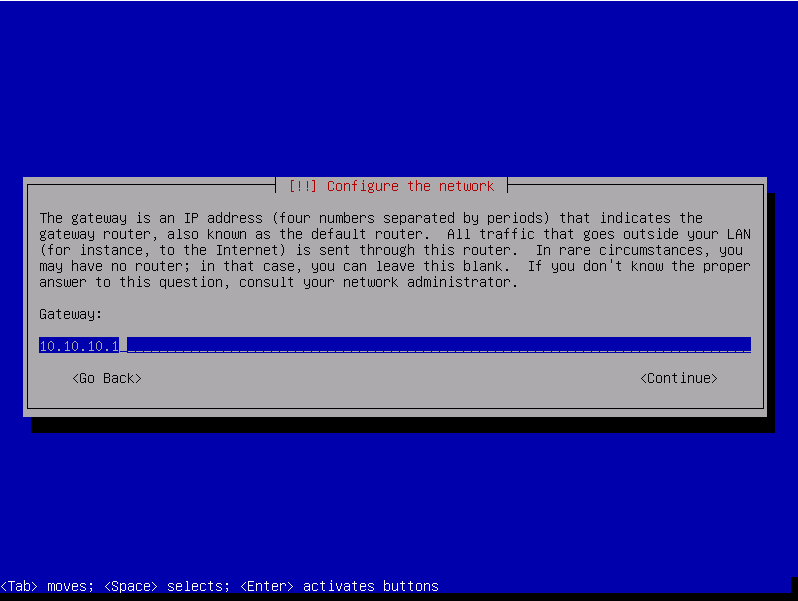
Fill gateway then select « Continue » and press enter.
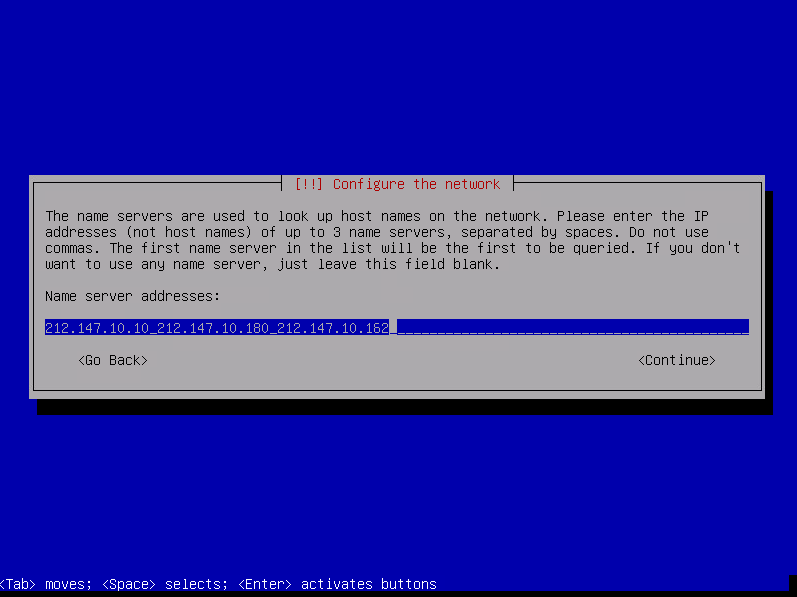
Fill name server addresses (212.147.10.10 212.147.10.180 212.147.10.162) then select « Continue » and press enter.
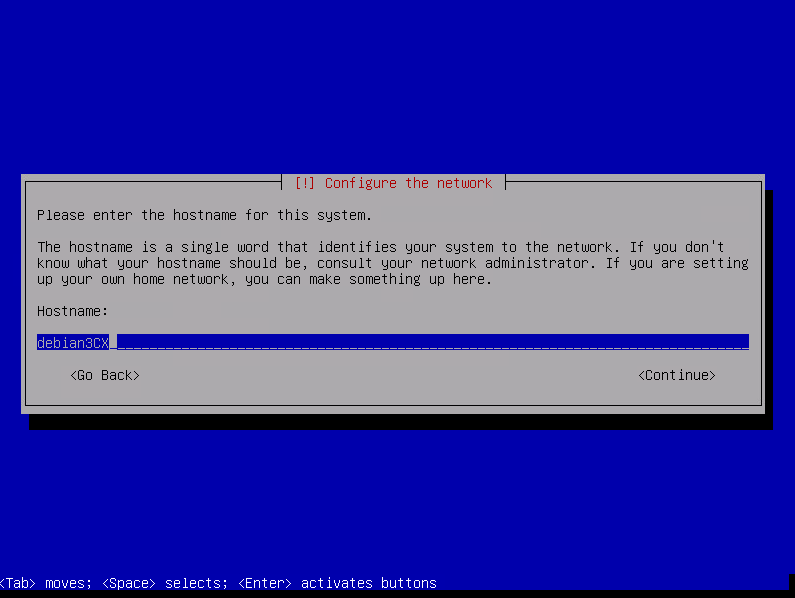
Fill hostname then select « Continue » and press enter.
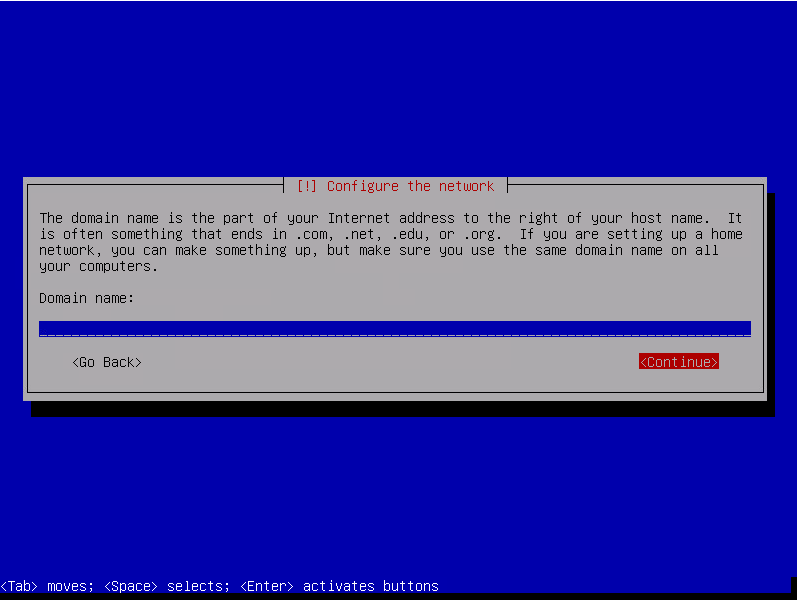
Fill domain name then select « Continue » and press enter.
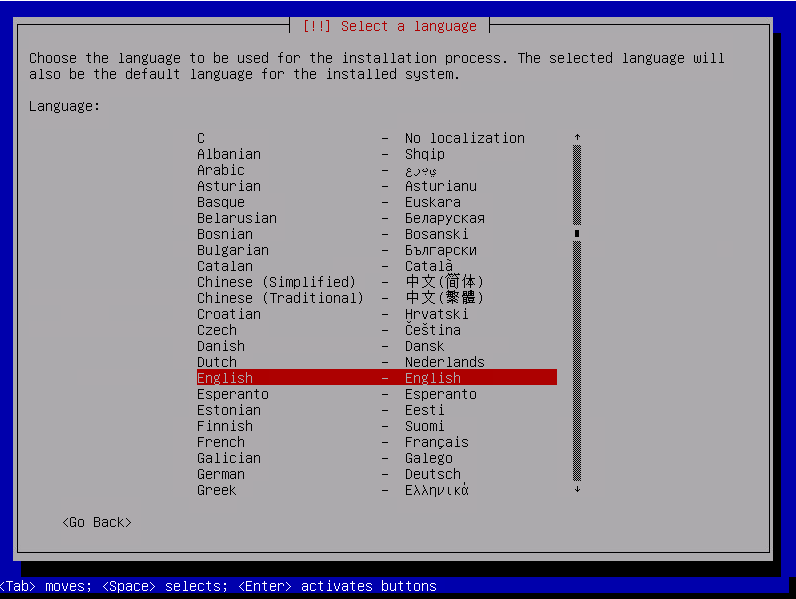
Choose language and press enter.
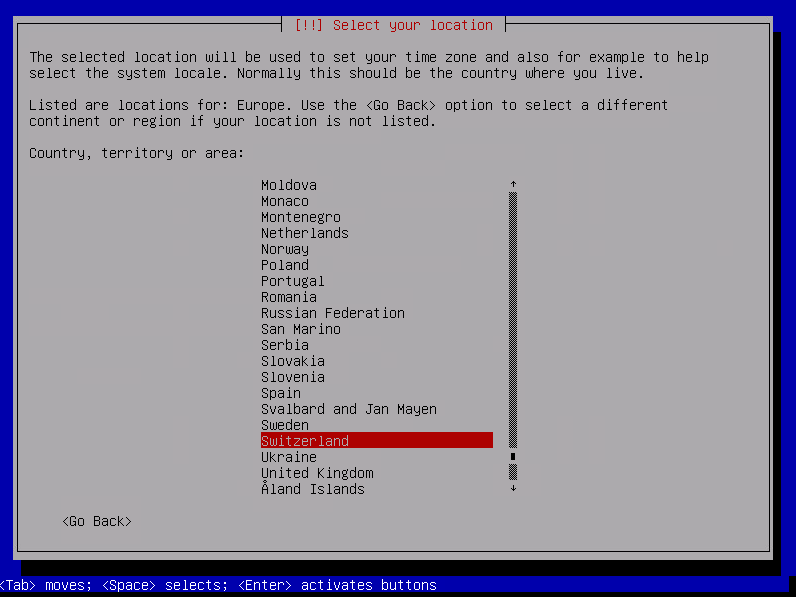
Choose the location, go to « other », « Europe » then « Switzerland »
Choose your locales, by default en_US.UTF-8

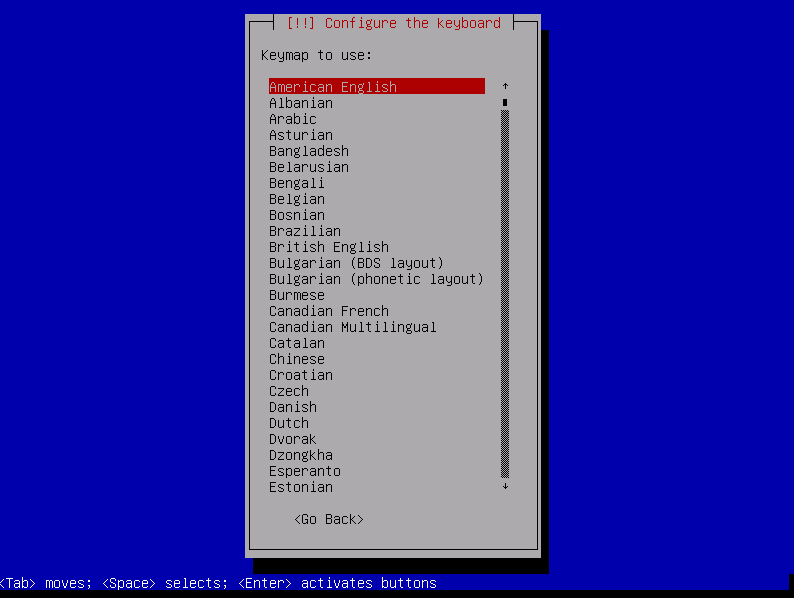
Choose your keyboard layout, in our case « Swiss french ».
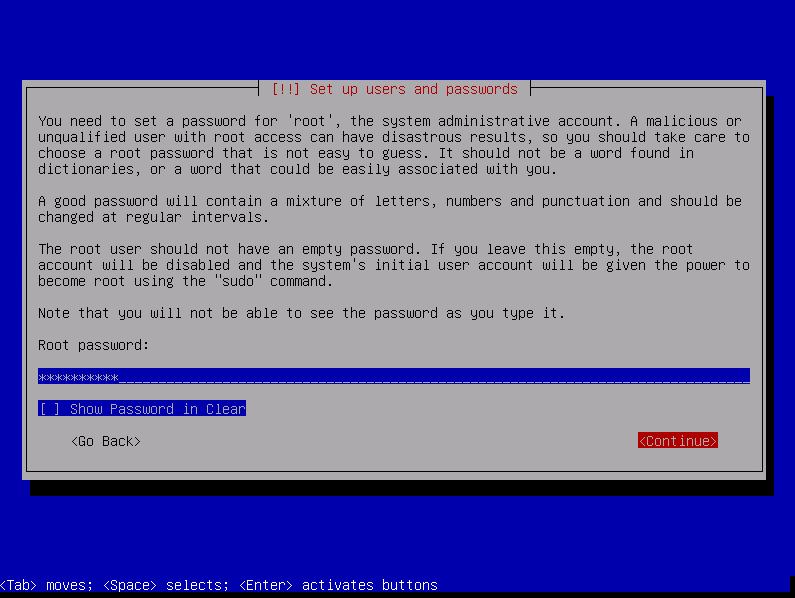
Create the root password
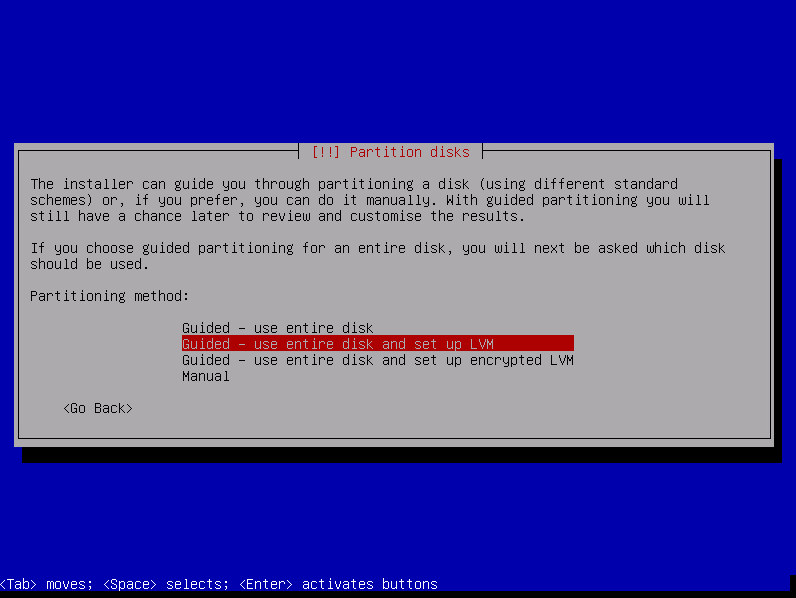
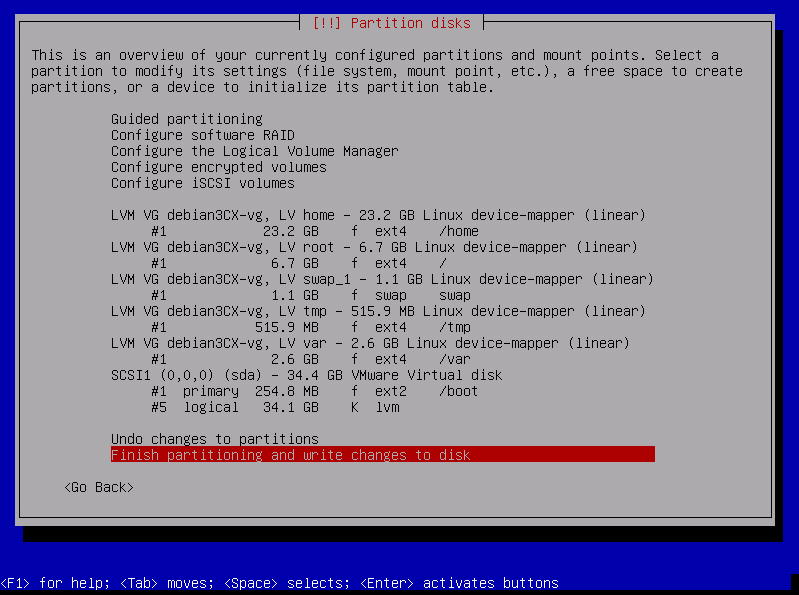
Choose partitioning method, we will choose « Guided - use entire disk and set up LVM »
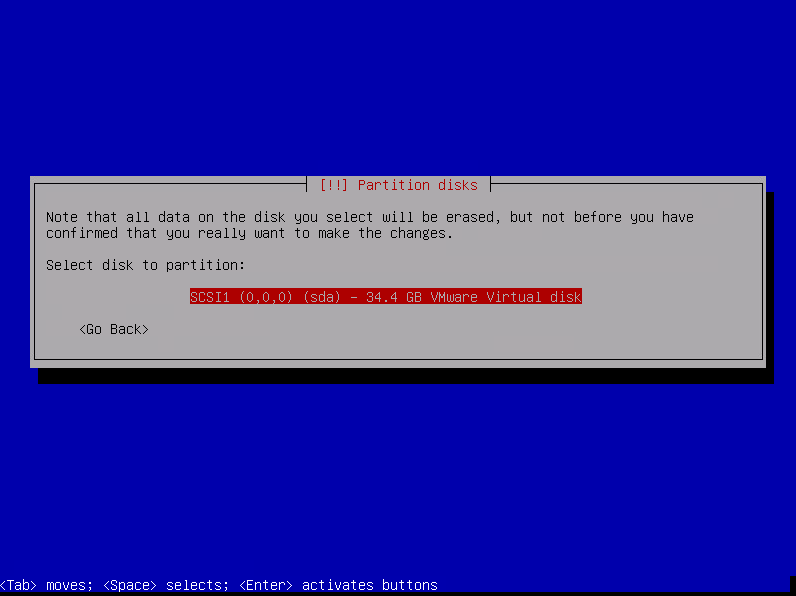
Select the disk to partition then press enter.
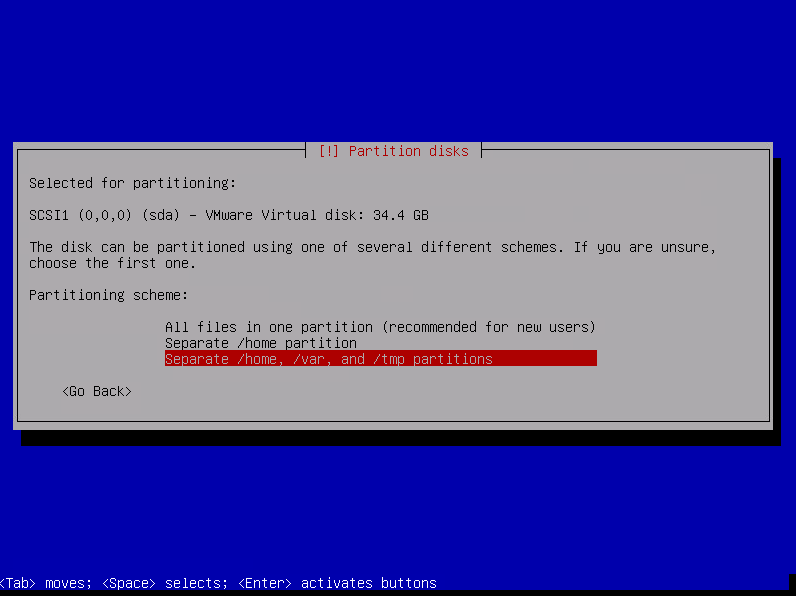
Choose the partitioning scheme « Separate /home, /var, and /tmp partitions » and press enter
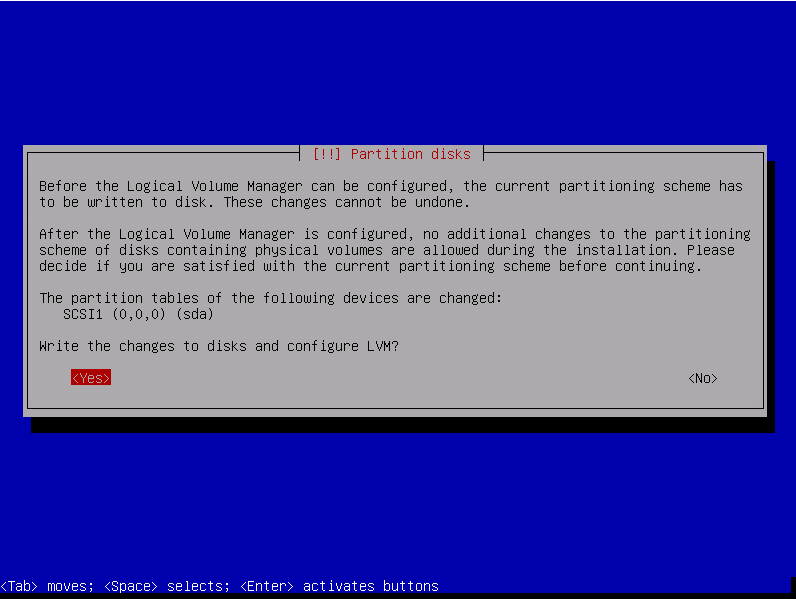
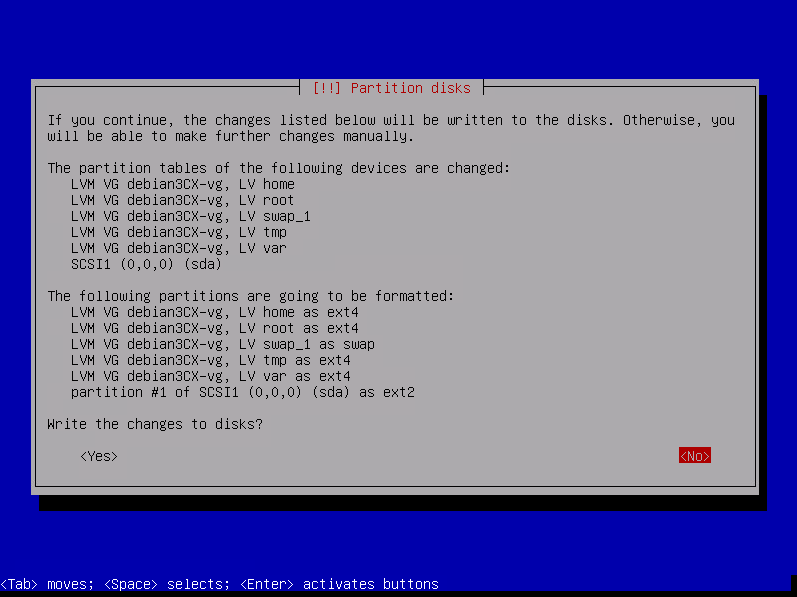
Select YES to write changes to disks and confirm with enter
Review the partitioning then select « Finish partitioning and write changes to disk » then press enter
Confirm the writes by selecting « YES » then press enter
The system will install all components then reboot automaticaly.
Configuration[edit | edit source]
Configuration of the 3CX system[edit | edit source]
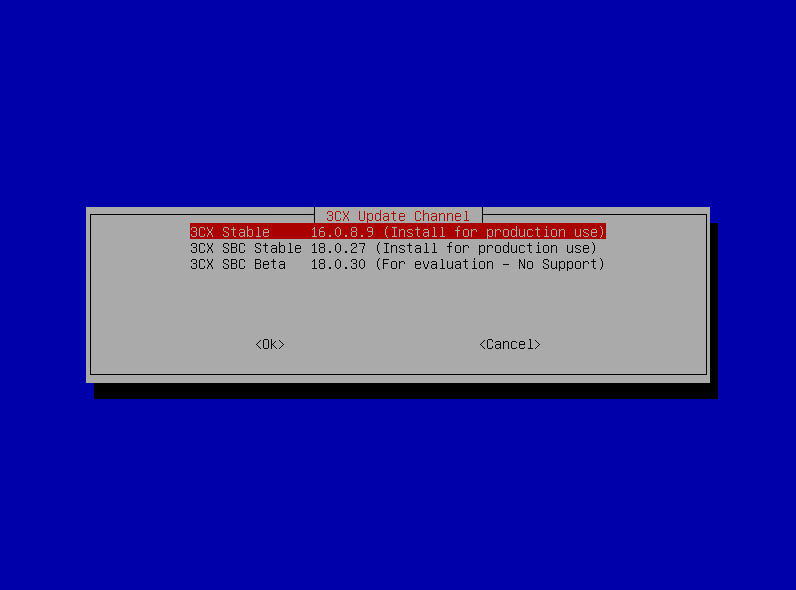
After the reboot you will need to select « 3CX Stable X.X.X.X (Install for production use) and press enter
After installation you need to accept the 3CX License Agreement.

After that the system will reboot into 3CX Configuration Tool.
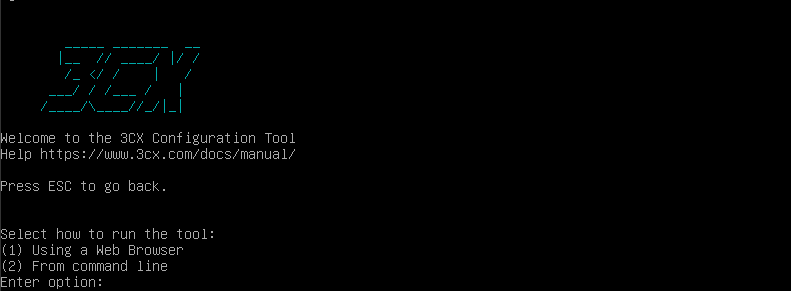
Choose option "1"
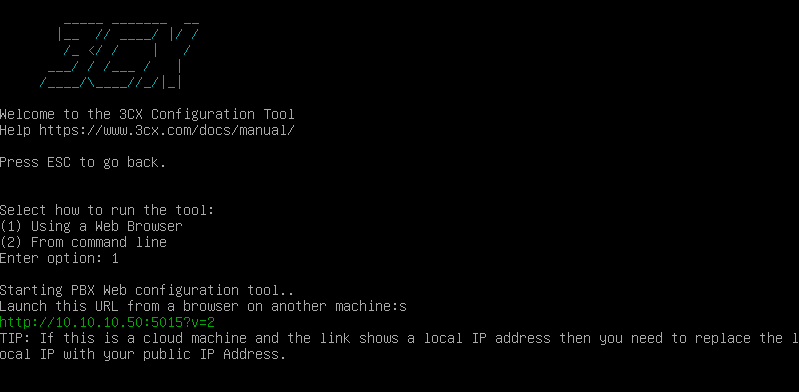
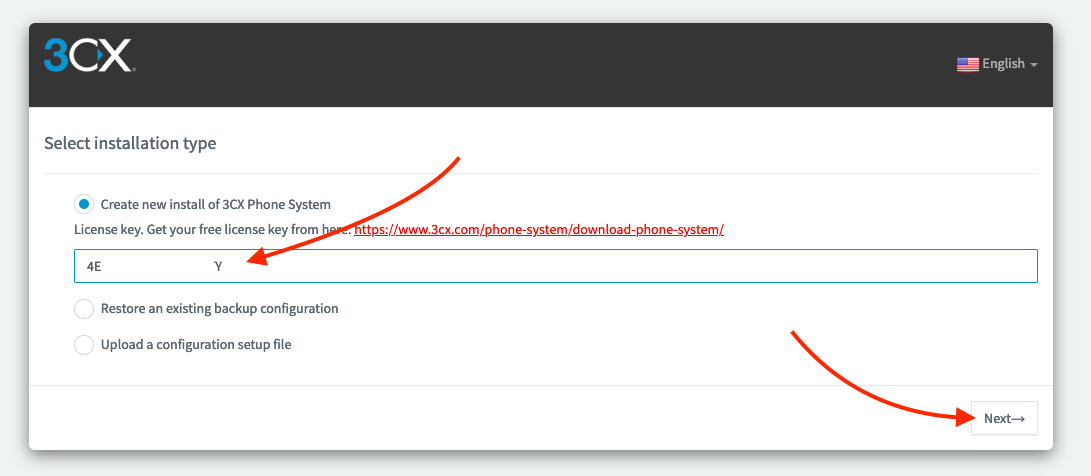
Go to the webpage http://YOURIP:5015 Then choose the installation type. In our case « Create new install of 3CX Phone System ». Enter the license key then click « Next ».
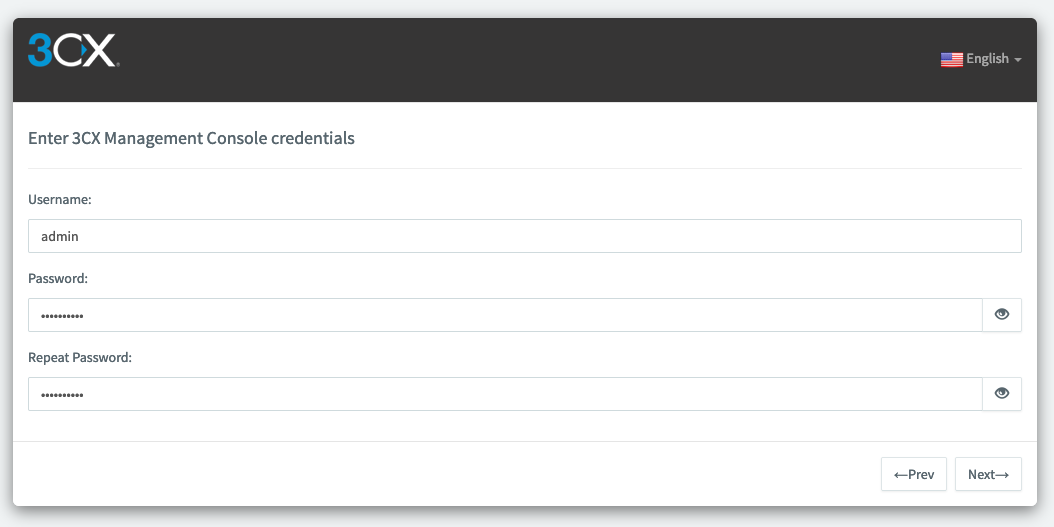
Then create the credentials for your 3CX Management Console then click on « Next »
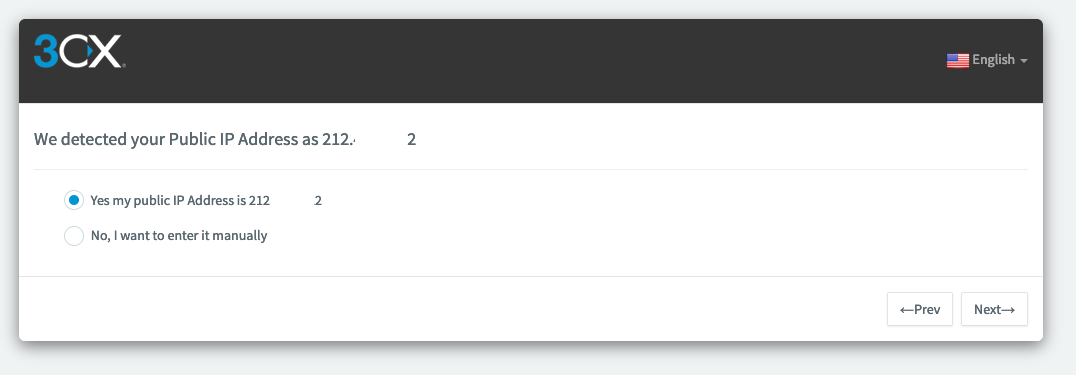
Then the tool will detect your public IP (if it is not correct choose « No, i want to enter it manually ») then click on « Next »
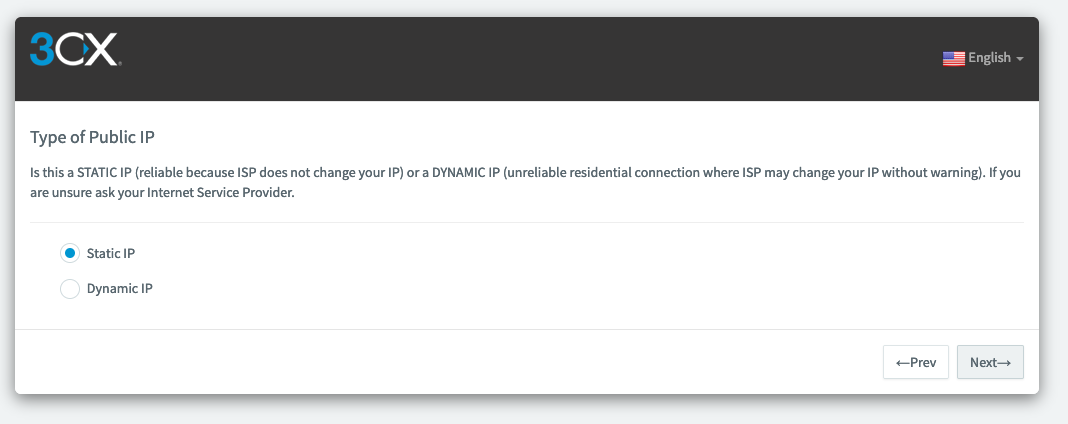
Then choose your type of Public IP and click on « Next »
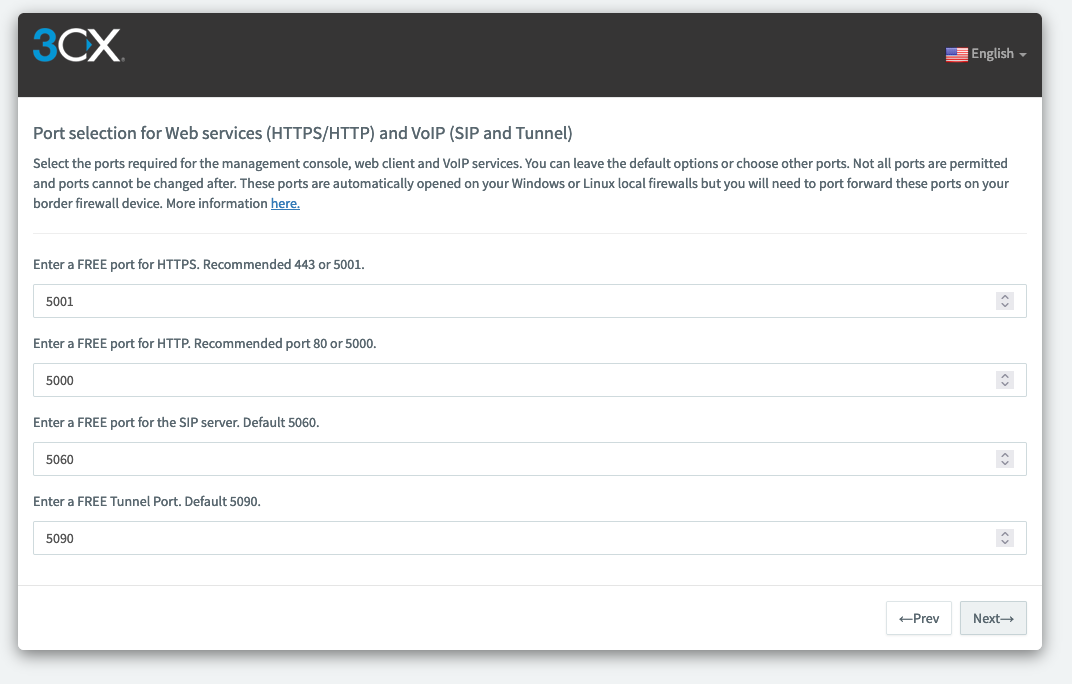
Then let by default all ports configuration
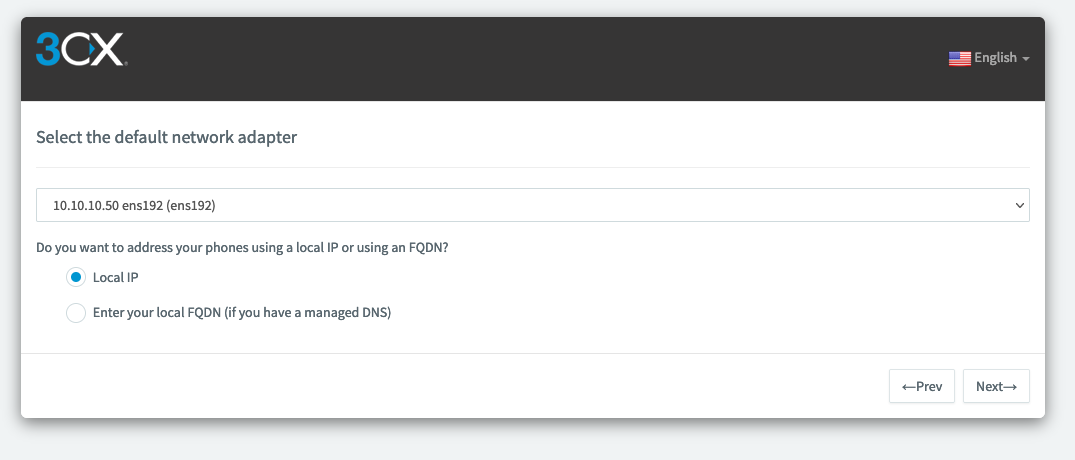
Select the right network adapter
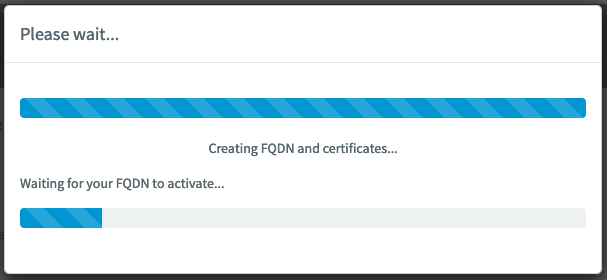
Wait until everything is automatically configured.
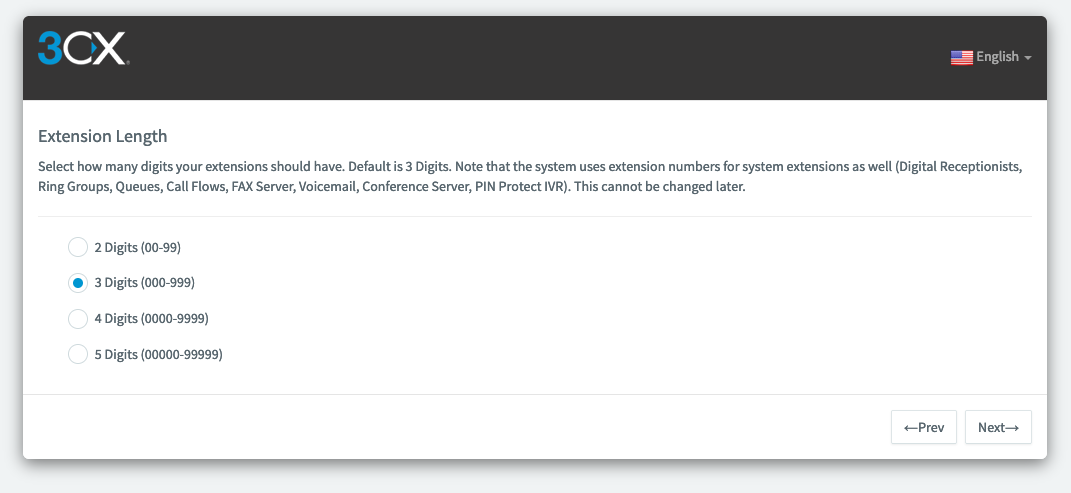
Choose the extension length, in our case "3 Digits"
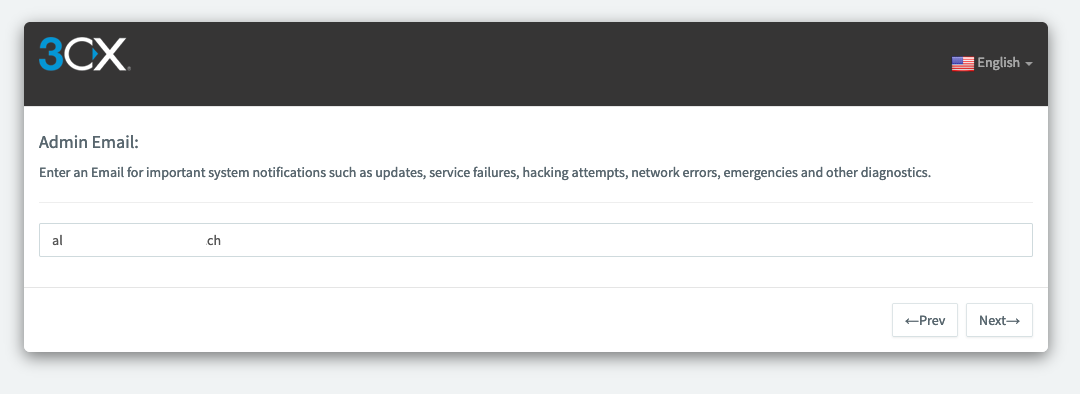
Then enter your admin email address and click on « Next »
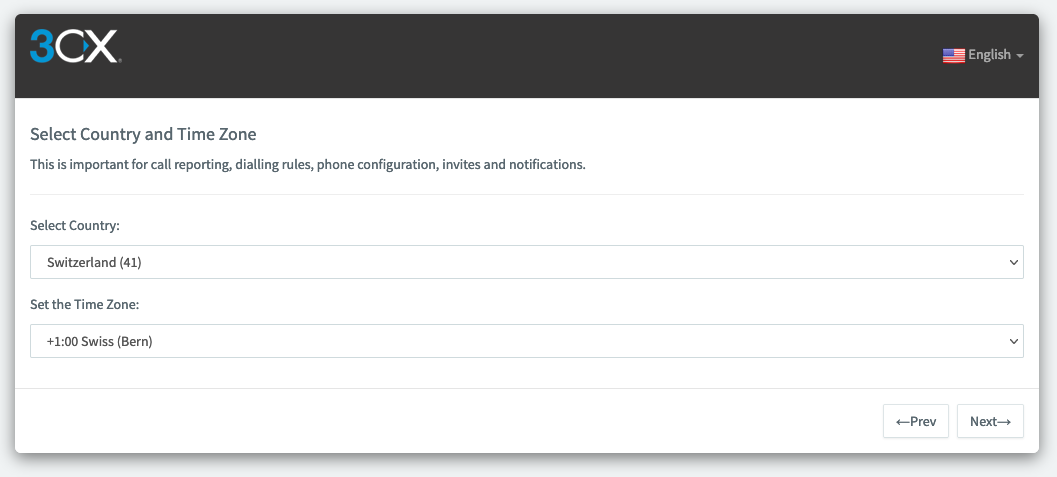
Choose your Country and Time Zone then click on « Next »
Create the Operator extension

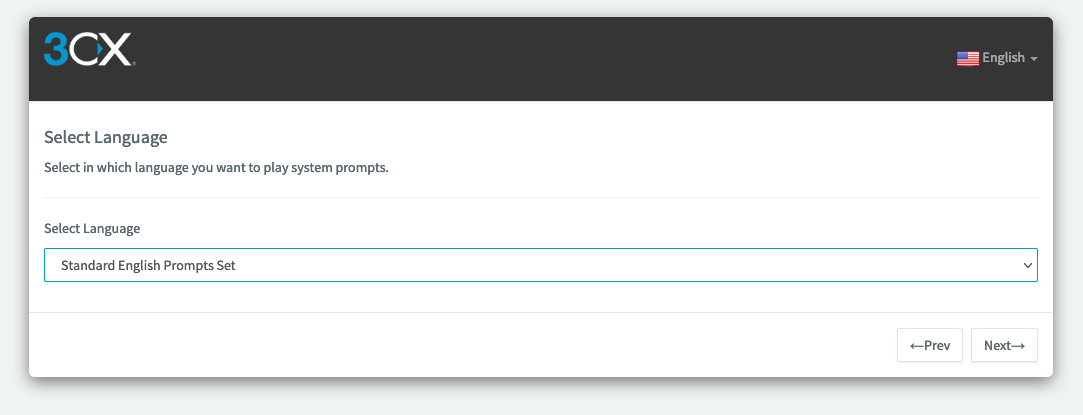
Choose « International Networks » then click on « Next »

Select the language of the trunk.
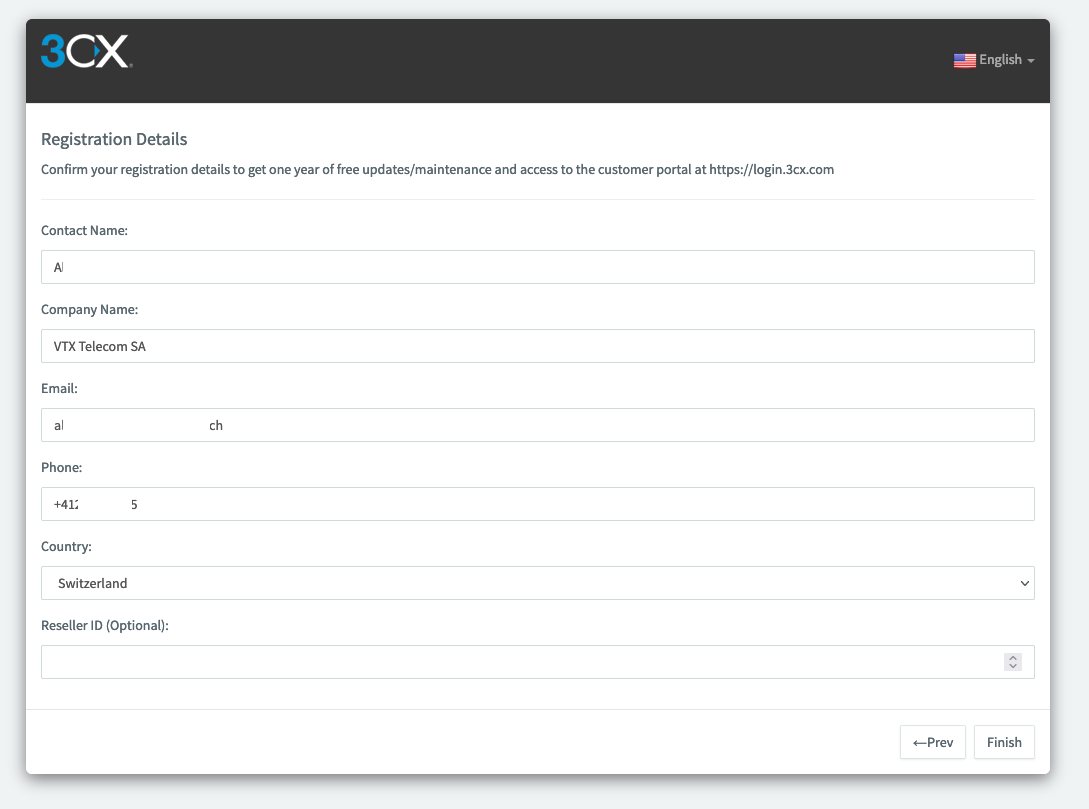
Confirm the registration details at 3CX and click « Finish »
Then you will see this confirmation of the 3CX installation with all useful information

Setup 3CX Trunk using VTX SIP Trunk Template[edit | edit source]
FIXME: To be added