VoIP:Teams:Microsoft Management
From VTX Public Wiki
Connect to Microsoft 365 Admin Portal[edit | edit source]
| You can use this interfaces for the Domain Management, User management, License management and Software Management |
- Signup URL : https://signup.microsoft.com/
- Main Admin URL : https://admin.microsoft.com/
- Domain Management URL: https://admin.microsoft.com/Adminportal/Home#/Domains
- User Management URL: https://admin.microsoft.com/Adminportal/Home#/users
- Purchase Services URL: https://admin.microsoft.com/adminportal/home?add=sub&adminportal=1#/catalog
Create a temporarily user in the <servicenumber>.teams.ipvoip.ch domain[edit | edit source]
| None of your user will use the <servicenumber>.teams.ipvoip.ch, but as stated in the Requirements above, we need to create a temporarily user in this domain with the Teams + Phone System licenses in order to be able to create the CsOnlineVoiceRoute towards VTX SBC |
- Problematic: We wish to create a enableteams@<servicenumber>.teams.ipvoip.ch to enable Teams connection towards VTX VoIP platform
- Solution: Please follow the procedure below
- Connect to https://admin.microsoft.com/Adminportal/Home#/users
- Create a new user enableteams@<servicenumber>.teams.ipvoip.ch ( First Name: "Temp User" / Last Name : "VTX Teams" / Login : enableteams@<servicenumber>.teams.ipvoip.ch / No Admin Right / "Teams" and "Phone System" licenses / No need to remember its password, we won't connect with it).
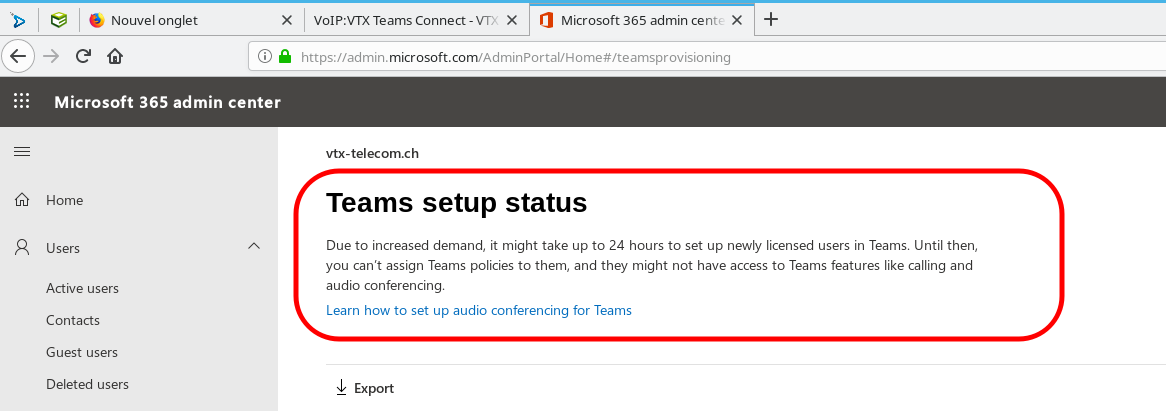
- Wait a few seconds/minutes/hours for Teams to be enabled on this user https://admin.microsoft.com/AdminPortal/Home#/teamsprovisioning
- Now even after user is created you night need to wait minutes/hours before being able to create Voice Routing ( especially the New-CsOnlineVoiceRoute ), so if you can please wait 4hours, if not, try to create the routing, if you get error, try again
- Once everything is working ( routing + user mapping + incoming and outgoing calls ), you can delete this user to free up the licenses
Voice Routing : Create Voice Routing to allow your users to use VTX Trunk[edit | edit source]
| You will only need to do voice routing setup once for all users |
| It will take several hours for Microsoft to create your domain after linking it in the Kiosk, so it is wise to wait a few hours before trying to create the routing. If it is not ready, you won't be able to login or Voice Routing will not work. So you will need to be really patient. |
| If the script displays a red error on New-CsOnlineVoiceRoutingPolicy, please read VoIP:Teams:Microsoft Management#New-CsOnlineVoiceRoutingPolicy_-_Cannot_find_specified_Online_PSTN_usage |
| Once Voice Routing has been correctly created without error, you can delete the user enableteams@<servicenumber>.teams.ipvoip.ch to free up its licenses, it is not needed anymore |
Now you will need to setup a routing plan. You can use one of the following options to do it
- Using a Powershell Script that will ask you questions
- Manually in Powershell
Create Voice Routing using a VTX Powershell Script VTX_Teams_Create_Routing_Rules.ps1[edit | edit source]
| By default for security reason, it is not allowed to execute a powershell script downloaded on the internet, that is why you will need to open them with Wordpad to check what it does, save it and execute it afterwards |
| When you run the script, please look at all red warning errors that are being displayed, and use this wiki to handle any error. You can run the script several time in case of problem, simply discard the "duplicated" errors afterwards. Using the next manual section will help you see where the error comes from |
- Download https://wiki.vtx.ch/media/VTX_Teams_Create_Routing_Rules.ps1 on your computer ( Right Click on the link / Download )
- Open it with Wordpad and use Ctrl-s to save it again ( to inform the system that it is local script )
- Execute it on your PC : It will ask you for these parameters and create the routing
- VTX Teams Domain : ex: 123456.teams.ipvoip.ch
- Your MS Teams Admin Credentials : ex: admin@COMPANY.onmicrosoft.com
Or Create Voice Routing manually in Powershell Command Prompt[edit | edit source]
| If you prefer a manual setup, perform the following actions |
- Open a powershell prompt on your PC
- Copy paste command below one by one changing the values in bold with your own
# Set Variables
$TeamsDomain = "123456.teams.ipvoip.ch"
# Connect to Microsoft Teams management and create all Voice Routing
Connect-MicrosoftTeams
Set-CsOnlinePstnUsage -Identity Global -Usage @{Add="CsOnlinePstnUsage-$TeamsDomain"}
New-CsOnlineVoiceRoute -Identity "CsOnlineVoiceRoute-$TeamsDomain" -Priority 0 -NumberPattern '.*' -OnlinePstnGatewayList "$TeamsDomain" -OnlinePstnUsages "CsOnlinePstnUsage-$TeamsDomain"
New-CsOnlineVoiceRoutingPolicy -Identity "CsOnlineVoiceRoutingPolicy-$TeamsDomain" -OnlinePstnUsages "CsOnlinePstnUsage-$TeamsDomain"
Set-CsCallingLineIdentity -Identity Global -EnableUserOverride $True

# Verify all setup ( You can compare it with the Debug Section in the wiki )
Get-CsOnlinePstnUsage
Get-CsOnlineVoiceRoute
Get-CsOnlineVoiceRoutingPolicy
Get-CsCallingLineIdentity

# Logout
Disconnect-MicrosoftTeams
Dial Plan for Emergency Numbers + Short Numbers + Special Setup[edit | edit source]
- Information: By default if you try to dial a number, Teams Client will always try to normalize it in +e164 mode adding your country prefix like +41 or +33 to your number
- Problem: If you call an emergency number like 112 or a Short number like 10XX or 3XXX or 116xxx or ..., it will add an invalid country prefix
- Problematic: Add Dial Plan entries not to alter number dialed
- Symptoms: Within the Teams Client, you will directly see if the number you are typing is being transformed with a county prefix or not. If it is transformed, you are missing the following rules
- Documentation:
- Solution: use one of the solution below to setup the Dialplan from web interface, or from powershell
- Setup from web interface, cf
- Or Setup from powershell, cf
- Or setup using the Script, cf
| Needed for Product Type | Compulsory | Name | Description | If condition | Then do this | Explanation |
|---|---|---|---|---|---|---|
| Teams Connect
Teams Virtual |
Emergency Numbers | Allows to dial Emergency numbers | ^(1[0-9]|1[0-9]{2})$ | $1 | Allows 1x and 1xx Emergency numbers | |
| Teams Connect
Teams Virtual |
Short Numbers | Allows to dial Short numbers | ^(3[0-9]{3}|1[0-9]{3}|11[68][0-9]{3})$ | $1 | Allows 3xxx + 1xxx + 116xxx + 118xxx short numbers | |
| Teams Virtual | optional | Prefix-Star | Allow VTX Feature codes using a "*" prefix | ^(\*\d+(\d|\*|\#)*)$ | $1 | Would allow any code like *<code> |
| Teams Virtual | optional | Prefix-Hash | Allow disabling of VTX Feature codes using a "#" prefix | ^(\#(\d|\*)+)$ | $1 | Would allow any code like #<code> |
| Teams Virtual | optional and to adapt | Short number 84xx | Call colleagues using the 4 last digits of their number | ^(84\d{2})$ | +4122879$1 | Takes a number dialed with 84xx and add "+4122879" in front of it |
| Teams Virtual | optional and to adapt | Group number 2xx | Call VTX VPBX groups | ^(2\d{2})$ | +41228798400$1 | Takes a number dialed with 2xx and add "+41228798400" in front of it |
Setup Dialplan from Web interface[edit | edit source]
- Connect to https://admin.teams.microsoft.com/one-policy/settings/dialplan
- Edit the Global Dialplan to add mapping based on your needs ( in Advanced mode )
- You can test your extension mapping with the test tool

Setup Dialplan from Powershell[edit | edit source]
- Problematic: Setup the compulsory dialplan for Emergency and Short numbers from powershell command
- Solution: Use the command below
- Impact: Wait a few minutes, and dial again ( type the number, do not call it from history ), you should see that now short numbers are not rewritten anymore with a country prefix
Command used to create the compulsory dialplan for Emergency Numbers and Short Numbers
# Connect to Teams
Connect-MicrosoftTeams

# Create rule for emergency numbers (10-19, 100-199)
$emergencyRule = New-CsVoiceNormalizationRule -Identity "Global/Emergency Numbers" `
    -Pattern '^(1[0-9]|1[0-9]{2})$' `
    -Translation '$1' `
    -Description "Emergency numbers" `
    -InMemory

# Create rule for short numbers (3xxx, 1xxx, 116xxx, 118xxx)
$shortRule = New-CsVoiceNormalizationRule -Identity "Global/Short Numbers" `
    -Pattern '^(3[0-9]{3}|1[0-9]{3}|11[68][0-9]{3})$' `
    -Translation '$1' `
    -Description "Short numbers" `
    -InMemory

# Add rules to Global Dial Plan
Set-CsTenantDialPlan -Identity "Global" -NormalizationRules @{Add=$emergencyRule,$shortRule}

# Verify rules have been created
Get-CsTenantDialPlan -Identity "Global" | Select-Object Identity, NormalizationRules | Format-List
Command to verify the Dialplan
PS C:\Users\mlr> Get-CsTenantDialPlan -Identity "Global" | Select-Object Identity, NormalizationRules | Format-List


Identity           : Global
NormalizationRules : {Description=Emergency numbers;Pattern=^(1[0-9]|1[0-9]{2})$;Translation=$1;Name=Emergency
                     Numbers;IsInternalExtension=False, Description=Short
                     numbers;Pattern=^(3[0-9]{3}|1[0-9]{3}|11[68][0-9]{3})$;Translation=$1;Name=Short
                     Numbers;IsInternalExtension=False}
Command that can be used to delete all DialPlan Rule
# Delete all normalization rules from Global Dial Plan
Set-CsTenantDialPlan -Identity "Global" -NormalizationRules @()
Setup Dialplan using the powershell script[edit | edit source]
- Prerequisites: Run again the VoIP:VTX_Teams_Connect#Update_all_VTX_Powershell_scripts_to_last_version to download the
- Solution: Run the script VTX_Teams_Create_Routing_Rules.ps1 , it will ask you to connect and will automatically add the needed rules ( it will not delete the old ones if any )

Number Mapping : Assign/Unassign numbers to Microsoft accounts[edit | edit source]
Now you will need to assign a number and a routing plan to each user with a "Microsoft 365 Phone System" license. You can use one of the following options to do it
- Using a Powershell Script that will ask you questions
- Manually in Powershell
Assign/Unassign numbers using a VTX Powershell Script VTX_Teams_Assign_Numbers.ps1[edit | edit source]
| By default for security reason, it is not allowed to execute a powershell script downloaded on the internet, that is why you will need to open them with Wordpad to check what it does, save it and execute it afterwards |
- Download https://wiki.vtx.ch/media/VTX_Teams_Assign_Numbers.ps1 on your computer ( Right Click on the link / Download )
- Open it with Wordpad and use Ctrl-s to save it again ( to inform the system that it is local script )
- Execute it on your PC : It will ask you for these parameters and create the routing
- VTX Teams Domain : ex: 123456.teams.ipvoip.ch
- Your MS Admin Credentials for : ex: admin@MSDOMAIN.onmicrosoft.com
- The MS Team user email : ex: first.last@MSDOMAIN.onmicrosoft.com
- The Telephone number you wish to set : ex: +41225661234 / or leave string empty to unassign number from user
Here is a list of screenshots to see how the script works


Or Assign numbers manually in Powershell Command Prompt[edit | edit source]
| If you prefer a manual setup, perform the following actions |
- Open a powershell prompt on your PC
- Copy paste command below one by one changing the values in bold with your own
# Set Variables
$TeamsDomain = "123456.teams.ipvoip.ch"
$TeamsUserEmail = "first.last@MSDOMAIN.onmicrosoft.com"
$TeamsUserNumber = "+41215661234"
# Connect to Microsoft Teams management and assign number and profile to the user
Connect-MicrosoftTeams
# Assign a number to your user and the Call Routing
Set-CsPhoneNumberAssignment -Identity "$TeamsUserEmail" -PhoneNumber "$TeamsUserNumber" -PhoneNumberType DirectRouting
# Assign a Voice Routing Policy to your user to allow it to call out towards external numbers
Grant-CsOnlineVoiceRoutingPolicy -Identity $TeamsUserEmail -PolicyName "CsOnlineVoiceRoutingPolicy-$TeamsDomain"
# Disable voicemail of the user to prevent that it answers all calls if user is not connected
Set-CsOnlineVoicemailUserSettings -Identity $TeamsUserEmail -VoicemailEnabled $false
# Wait 60s for settings to be applied
Sleep -s 60
# Verify Your setup
Get-CsOnlineUser -Identity $TeamsUserEmail | Select EnterpriseVoiceEnabled,OnPremLineURI,OnlineVoiceRoutingPolicy,RegistrarPool | Format-List
# List all users with EnterPrise Voice Enabled
Get-CsOnlineUser ` -Filter {(enterprisevoiceenabled -eq $true)} ` | Select sipaddress,HostedVoicemailPolicy,OnlineVoiceRoutingPolicy,lineuri | Format-List
# Logout
Disconnect-MicrosoftTeams
Or Unassign numbers manually in Powershell Command Prompt[edit | edit source]
| If you prefer a manual setup, perform the following actions |
- Open a powershell prompt on your PC
- Copy paste command below one by one changing the values in bold with your own
# Set Variables
$TeamsDomain = "123456.teams.ipvoip.ch"
$TeamsUserEmail = "first.last@MSDOMAIN.onmicrosoft.com"
$TeamsUserNumber = "+41215661234"
# Connect to Microsoft Teams management and assign or unassign number and profile to the user
Connect-MicrosoftTeams
# Unassign a number to your user and the Call Routing
Remove-CsPhoneNumberAssignment -Identity "$TeamsUserEmail" -PhoneNumber "$TeamsUserNumber" -PhoneNumberType DirectRouting
# Verify Your setup
Get-CsOnlineUser -Identity $TeamsUserEmail | Select EnterpriseVoiceEnabled,OnPremLineURI,OnlineVoiceRoutingPolicy,RegistrarPool | Format-List
# List all users with EnterPrise Voice Enabled
Get-CsOnlineUser ` -Filter {(enterprisevoiceenabled -eq $true)} ` | Select sipaddress,HostedVoicemailPolicy,OnlineVoiceRoutingPolicy,lineuri | Format-List
# Logout
Disconnect-MicrosoftTeams