VoIP:Teams:Microsoft Management: Difference between revisions
From VTX Public Wiki
(Keep section common) |
(→Assign numbers using a VTX Powershell Script VTX_Teams_Assign_Numbers.ps1: Here is a list of screenshots to see how the script works) |
||
| Line 80: | Line 80: | ||
{{Warning|1=By default for security reason, it is not allowed to execute a powershell script downloaded on the internet, that is why you will need to open them with Wordpad to check what it does, save it and execute it afterwards}} |
{{Warning|1=By default for security reason, it is not allowed to execute a powershell script downloaded on the internet, that is why you will need to open them with Wordpad to check what it does, save it and execute it afterwards}} |
||
{{Notice|1='''2020-09-02''' : New version 1.5 of the script allows to setup several numbers at once}} |
|||
# Download https://wiki.vtx.ch/media/VTX_Teams_Assign_Numbers.ps1 on your computer ( Right Click on the link / Download ) |
# Download https://wiki.vtx.ch/media/VTX_Teams_Assign_Numbers.ps1 on your computer ( Right Click on the link / Download ) |
||
| Line 89: | Line 90: | ||
## The Telephone number you wish to set : ex: +41225661234 |
## The Telephone number you wish to set : ex: +41225661234 |
||
''Here is a list of screenshots to see how the script works'' |
|||
<table> |
|||
<tr><td> |
|||
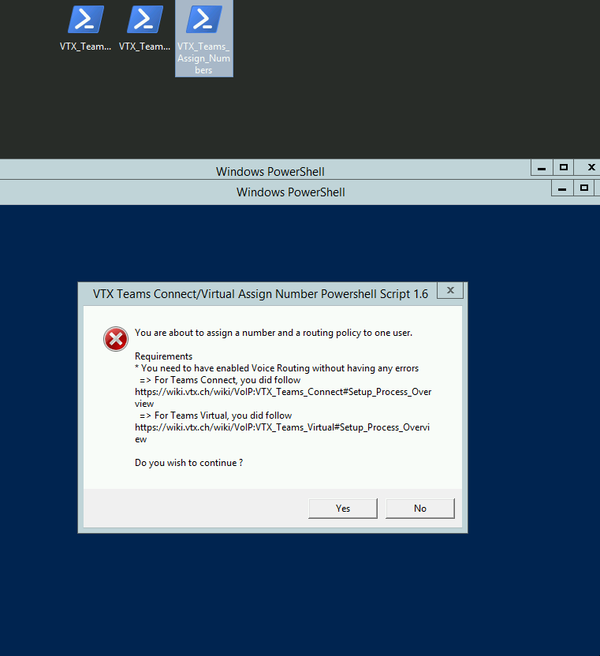
[[Image:Teams-Number-Assignment-01.png|thumb|600px|left|Teams Assignment - 1st Warning - Is routing OK ?]] |
|||
</td><td> |
|||
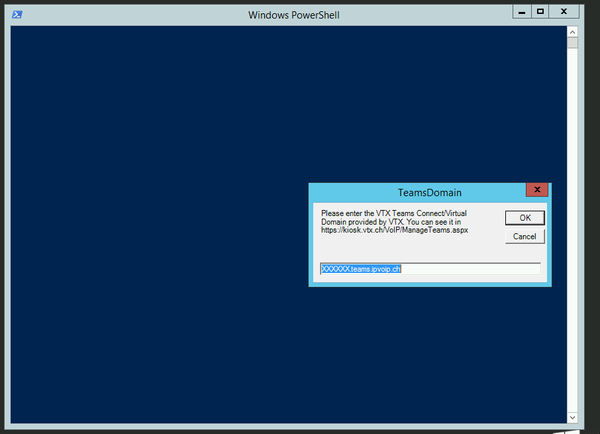
[[Image:Teams-Number-Assignment-02.png|thumb|600px|left|Teams Assignment - Enter the Teams Domain Provided by VTX]] |
|||
</td></tr> |
|||
<tr><td> |
|||
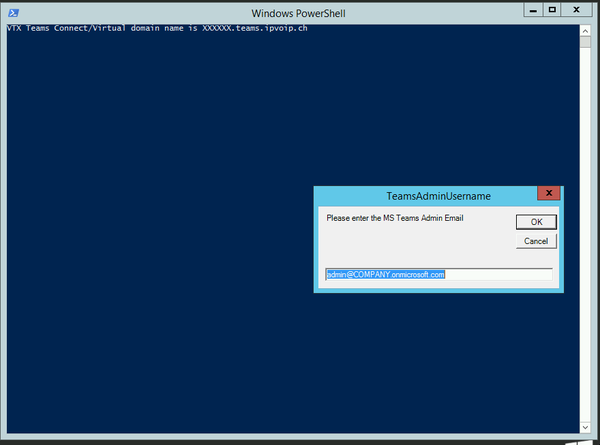
[[Image:Teams-Number-Assignment-03.png|thumb|600px|left|Teams Assignment - Enter Teams Admin email]] |
|||
</td><td> |
|||
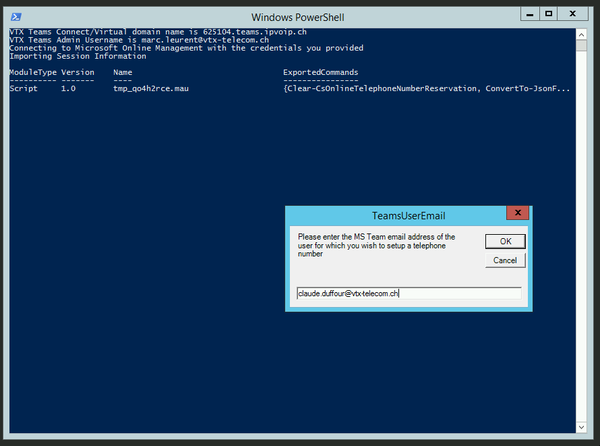
[[Image:Teams-Number-Assignment-04.png|thumb|600px|left|Teams Assignment - Enter Teams User Email]] |
|||
</td></tr> |
|||
<tr><td> |
|||
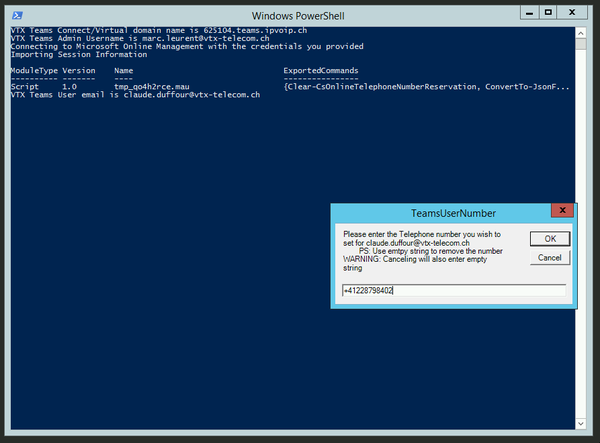
[[Image:Teams-Number-Assignment-05.png|thumb|600px|left|Teams Assignment - Enter Teams User Phone Number]] |
|||
</td><td> |
|||
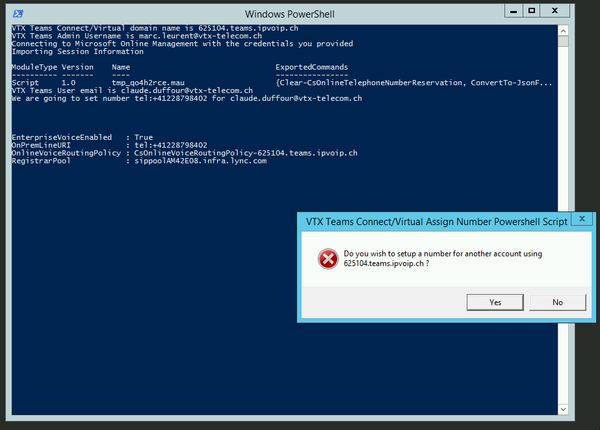
[[Image:Teams-Number-Assignment-06.png|thumb|600px|left|Teams Assignment - Setup another user ?]] |
|||
</td></tr> |
|||
<tr><td> |
|||
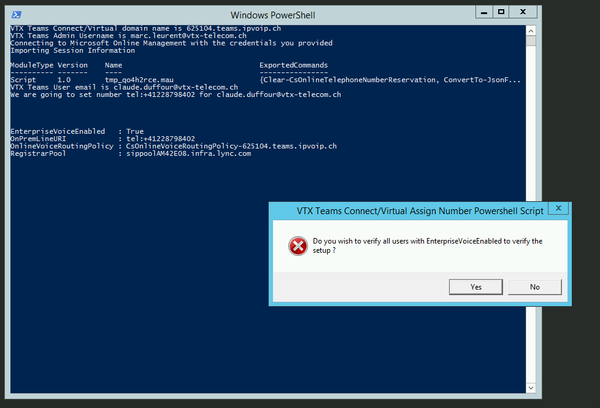
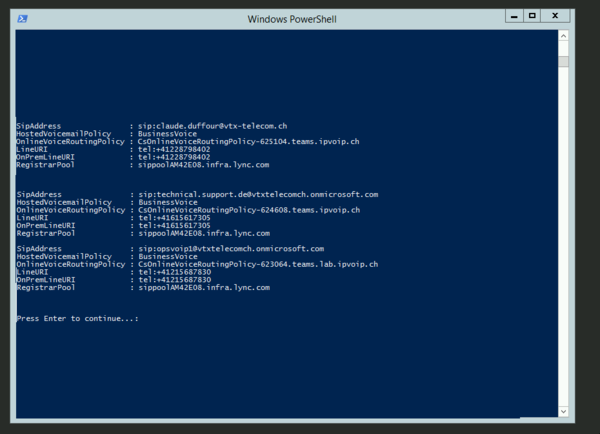
[[Image:Teams-Number-Assignment-07.png|thumb|600px|left|Teams Assignment - List all user setup ?]] |
|||
</td><td> |
|||
[[Image:Teams-Number-Assignment-08.png|thumb|600px|left|Teams Assignment - 1st Warning - Is routing OK ?]] |
|||
</td></tr> |
|||
</table> |
|||
=== Or Assign numbers manually in Powershell Command Prompt === |
=== Or Assign numbers manually in Powershell Command Prompt === |
||
Revision as of 09:12, 2 September 2020
Connect to Microsoft 365 Admin Portal[edit | edit source]
| You can use this interfaces for the Domain Management, User management, License management and Software Management |
- Main URL : https://admin.microsoft.com/
- Domain Management URL: https://admin.microsoft.com/Adminportal/Home#/Domains
- User Management URL: https://admin.microsoft.com/Adminportal/Home#/users
- License Management URL : https://businessstore.microsoft.com/en-us/embed/admin/store/purchase-services
Voice Routing : Create Voice Routing to allow your users to use VTX Trunk[edit | edit source]
| You will only need to do voice routing setup once for all users |
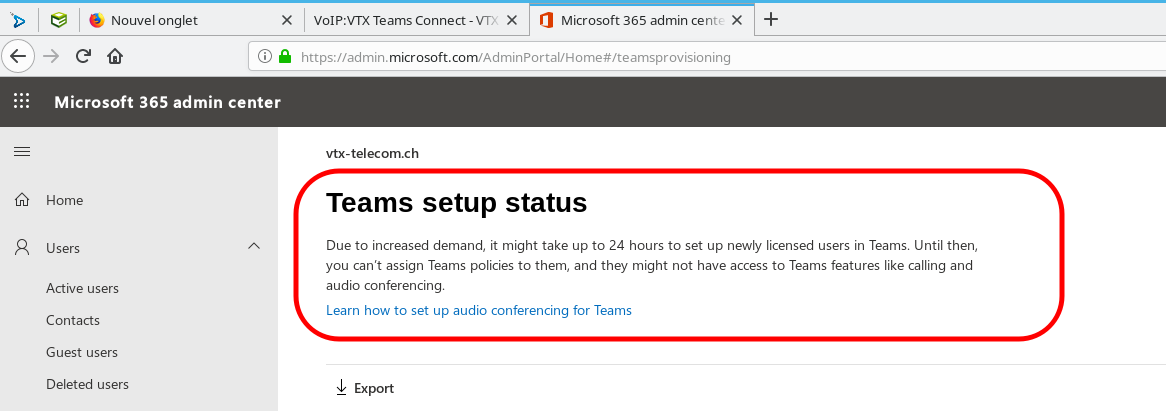
| It will take several hours for Microsoft to create your domain after linking it in the Kiosk, so it is wise to wait a few hours before trying to create the routing. If it is not ready, you won't be able to login or Voice Routing will not work. So you will need to be really patient. |
| If the script displays a red error on New-CsOnlineVoiceRoutingPolicy, please read VoIP:Teams:Debug#New-CsOnlineVoiceRoutingPolicy_-_Cannot_find_specified_Online_PSTN_usage |
| Once Voice Routing has been correctly created without error, you can delete the user enableteams@<servicenumber>.teams.ipvoip.ch to free up its licenses, it is not needed anymore |
Now you will need to setup a routing plan. You can use one of the following options to do it
- Using a Powershell Script that will ask you questions
- Manually in Powershell
Create Voice Routing using a VTX Powershell Script VTX_Teams_Create_Routing_Rules.ps1[edit | edit source]
| By default for security reason, it is not allowed to execute a powershell script downloaded on the internet, that is why you will need to open them with Wordpad to check what it does, save it and execute it afterwards |
| When you run the script, please look at all red warning errors that are being displayed, and use this wiki to handle any error. You can run the script several time in case of problem, simply discard the "duplicated" errors afterwards. Using the next manual section will help you see where the error comes from |
- Download https://wiki.vtx.ch/media/VTX_Teams_Create_Routing_Rules.ps1 on your computer ( Right Click on the link / Download )
- Open it with Wordpad and use Ctrl-s to save it again ( to inform the system that it is local script )
- Execute it on your PC : It will ask you for these parameters and create the routing
- VTX Teams Domain : ex: 123456.teams.ipvoip.ch
- Your MS Teams Admin Credentials : ex: admin@COMPANY.onmicrosoft.com
Or Create Voice Routing manually in Powershell Command Prompt[edit | edit source]
| If you prefer a manual setup, perform the following actions |
- Open a powershell prompt on your PC
- Copy paste command below one by one changing the values in bold with your own
# Set Variables
$MSTeamsDomain = "123456.teams.ipvoip.ch"
$MSteamsAdminUser = "admin@COMPANY.onmicrosoft.com"
# Connect to Microsoft Teams management and create all Voice Routing
$Session = New-CsOnlineSession -UserName $MSteamsAdminUser
Import-PSSession $Session -AllowClobber
Set-CsOnlinePstnUsage -Identity Global -Usage @{Add="CsOnlinePstnUsage-$MSTeamsDomain"}
New-CsOnlineVoiceRoute -Identity "CsOnlineVoiceRoute-$MSTeamsDomain" -Priority 0 -NumberPattern '.*' -OnlinePstnGatewayList "$MSTeamsDomain" -OnlinePstnUsages "CsOnlinePstnUsage-$MSTeamsDomain"
New-CsOnlineVoiceRoutingPolicy -Identity "CsOnlineVoiceRoutingPolicy-$MSTeamsDomain" -OnlinePstnUsages "CsOnlinePstnUsage-$MSTeamsDomain"
Set-CsCallingLineIdentity -Identity Global -EnableUserOverride $True

# Verify all setup ( You can compare it with the Debug Section in the wiki )
Get-CsOnlinePstnUsage
Get-CsOnlineVoiceRoute
Get-CsOnlineVoiceRoutingPolicy
Get-CsCallingLineIdentity

# Logout
Get-PSSession | Remove-PSSession
Number Mapping : Assign numbers to Microsoft accounts[edit | edit source]
Now you will need to assign a number and a routing plan to each user with a "Microsoft 365 Phone System" license. You can use one of the following options to do it
- Using a Powershell Script that will ask you questions
- Manually in Powershell
Assign numbers using a VTX Powershell Script VTX_Teams_Assign_Numbers.ps1[edit | edit source]
| By default for security reason, it is not allowed to execute a powershell script downloaded on the internet, that is why you will need to open them with Wordpad to check what it does, save it and execute it afterwards |
| 2020-09-02 : New version 1.5 of the script allows to setup several numbers at once |
- Download https://wiki.vtx.ch/media/VTX_Teams_Assign_Numbers.ps1 on your computer ( Right Click on the link / Download )
- Open it with Wordpad and use Ctrl-s to save it again ( to inform the system that it is local script )
- Execute it on your PC : It will ask you for these parameters and create the routing
- VTX Teams Domain : ex: 123456.teams.ipvoip.ch
- Your MS Admin Credentials for : ex: admin@MSDOMAIN.onmicrosoft.com
- The MS Team user email : ex: first.last@MSDOMAIN.onmicrosoft.com
- The Telephone number you wish to set : ex: +41225661234
Here is a list of screenshots to see how the script works
Or Assign numbers manually in Powershell Command Prompt[edit | edit source]
| If you prefer a manual setup, perform the following actions |
- Open a powershell prompt on your PC
- Copy paste command below one by one changing the values in bold with your own
# Set Variables
$MSTeamsDomain = "123456.teams.ipvoip.ch"
$MSteamsAdminUser = "admin@MSDOMAIN.onmicrosoft.com"
$MSTeamsUserEmail = "first.last@MSDOMAIN.onmicrosoft.com"
$MSTeamsUserNumber = "+41215661234"
# Connect to Microsoft Teams management and assign number and profile to the user
$Session = New-CsOnlineSession -UserName $MSteamsAdminUser
Import-PSSession $Session -AllowClobber
# Assign a number to your user and the Call Routing
Get-CsOnlineUser -Identity $MSTeamsUserEmail | Set-CsUser -EnterpriseVoiceEnabled $true -OnPremLineURI "tel:$MSTeamsUserNumber"
Get-CsOnlineUser -Identity $MSTeamsUserEmail | Grant-CsOnlineVoiceRoutingPolicy -PolicyName "CsOnlineVoiceRoutingPolicy-$MSTeamsDomain"
# Verify your setup
Get-CsOnlineUser -Identity $MSTeamsUserEmail | Select EnterpriseVoiceEnabled,OnPremLineURI,OnlineVoiceRoutingPolicy,RegistrarPool | Format-List
# List all users with EnterPrise Voice Enabled
Get-CsOnlineUser ` -Filter {(enterprisevoiceenabled -eq $true) -and(HostingProvider -eq "sipfed.online.lync.com")} ` | Select sipaddress,HostedVoicemailPolicy,OnlineVoiceRoutingPolicy,lineuri,OnPremLineURI,RegistrarPool | Format-List
# Logout
Get-PSSession | Remove-PSSession

